Introduction to workflows
Workflows are meant to guide a team of users through a certain repetitive processes consisting of certain steps. A task management system is provided as the single entry point to perform actions in the CP Portal. To avoid accidental changes the workflows automize repeating steps and users only get access to the project’s data when they need to make changes. Additionally users are guided through tailored UI views to simplify their tasks.
Workflow user role
Any user that should work within a workflow should be assigned the workflow user role. Users with this role have a limited view on the Portal’s UI. Their only entry point to change data in a project is through tasks that are assigned to them through a workflow.
Important
- Technically workflow users have write access to a project. While the UI pevents them from executing these write permissions to objects and data outside their tasks, they have full write access to a project through the APIs
Task list
The task list shows all pending tasks a user has in a project. Also using the link provided with the task allows the user to jump to the view needed to carry out the actions needed to complete the task. Some tasks can be closed through the task list, others can only be completed from within the task specific view after using the provided link
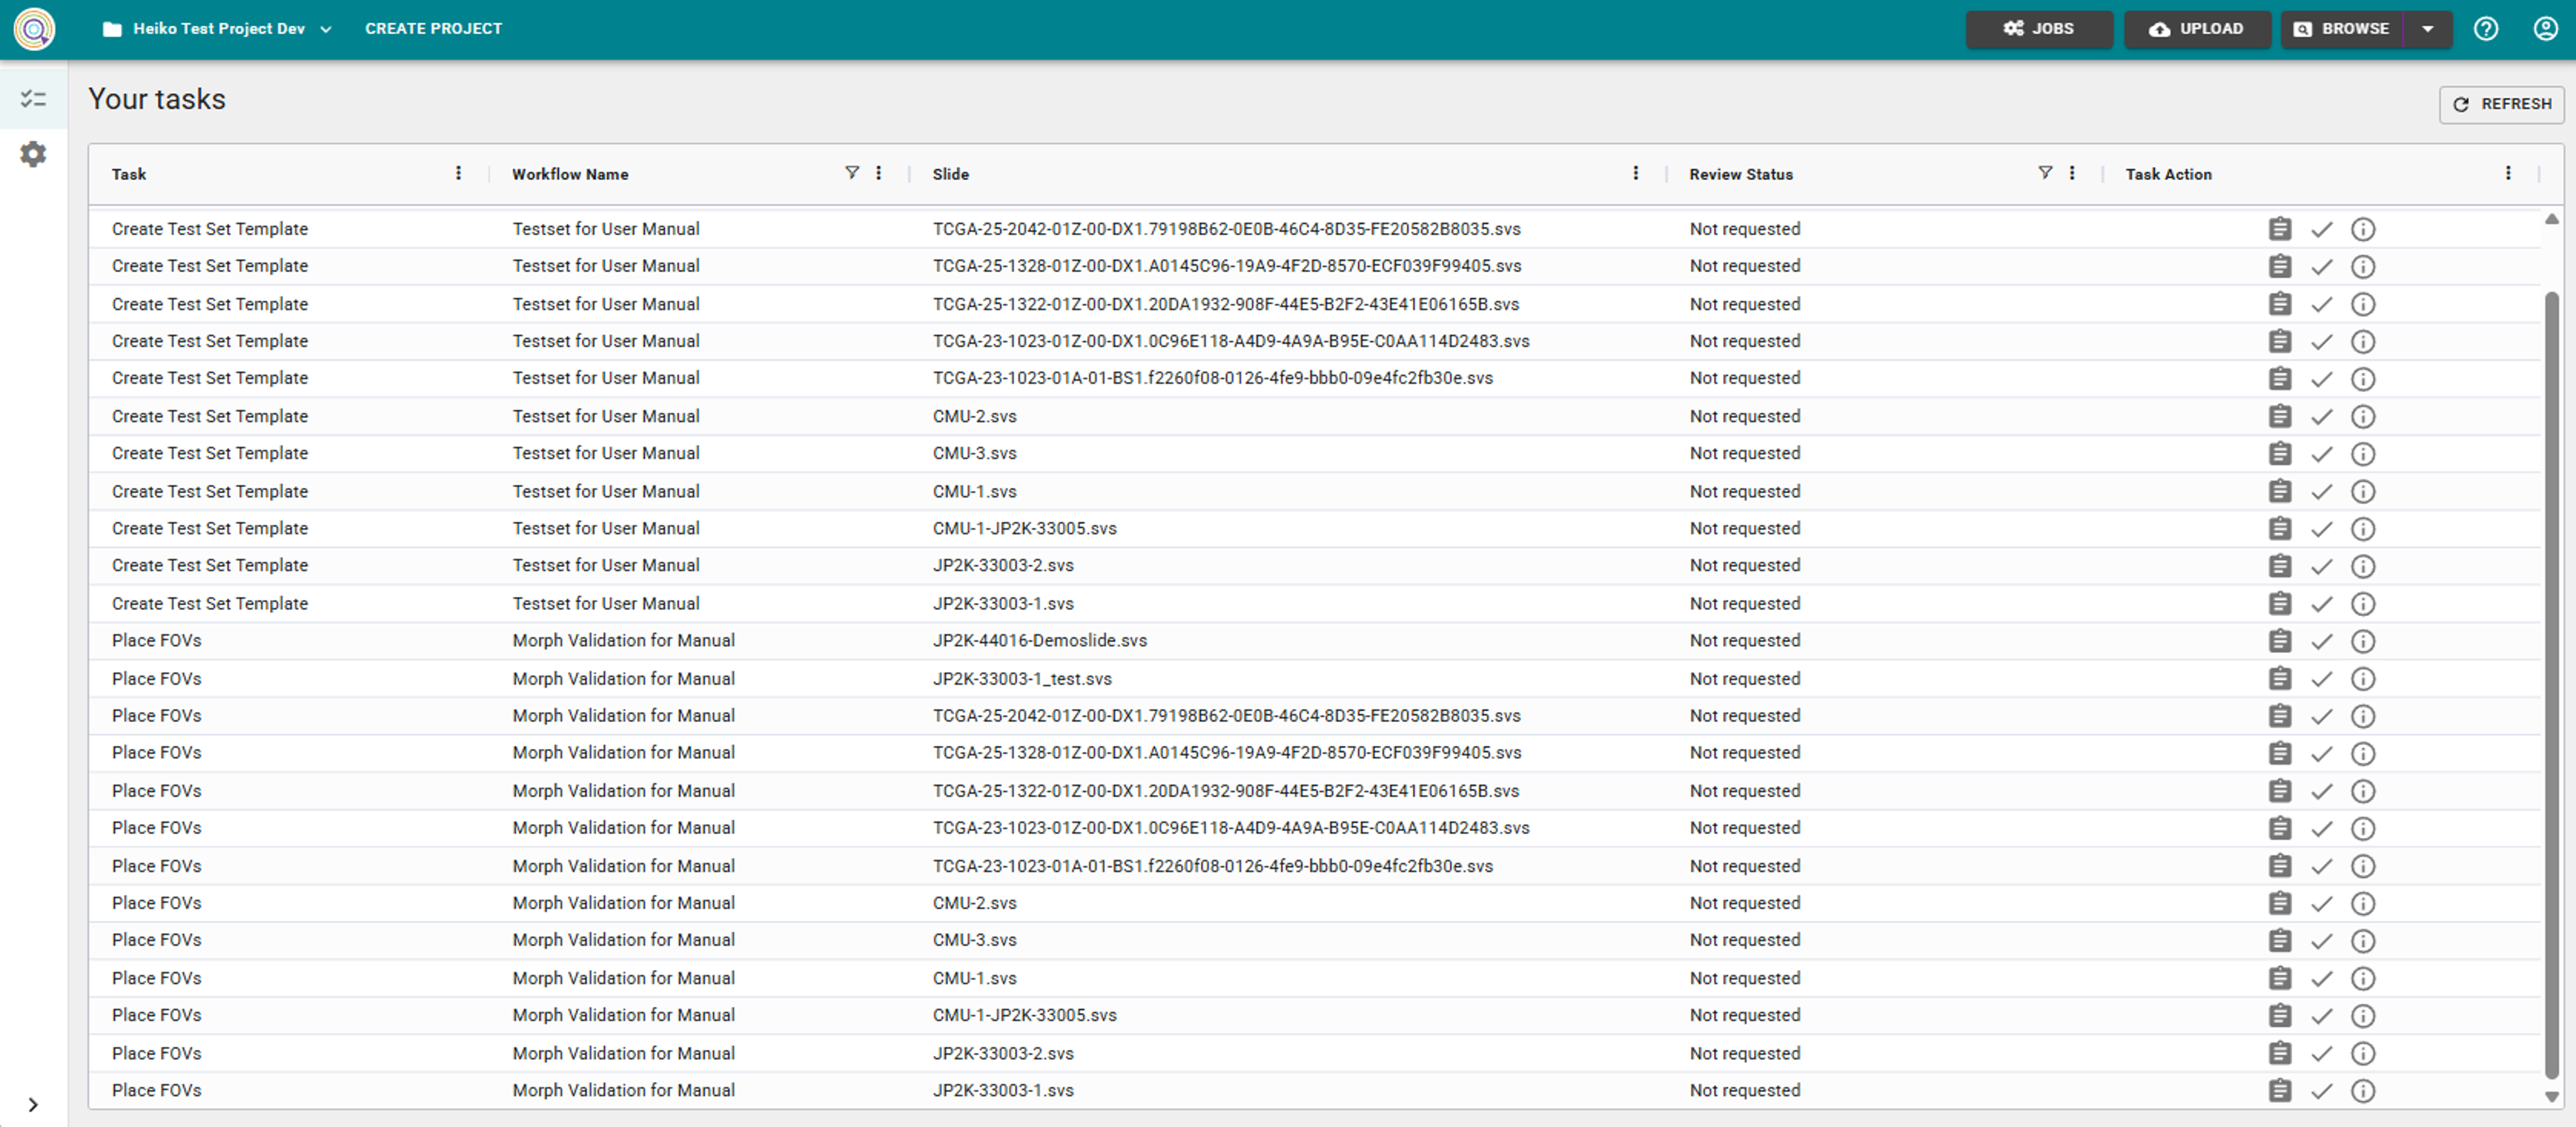
Image: Workflow task list with pending tasks
Workflow types
Test Set Annotation Workflow
The Test Set Annotation workflow serves to create test set annotations. This requires a lead pathologist to place FOVs on a set of slides to cover all required combinations of morphological features. Additionally he places ROIs in the FOVs and CMAs. This is referred to as the template. The FOVs are then going into three parallel streams where several groups of pathologists provide raster annotations for ART. The groups all receive the same FOVs, in order to even out slight differences between the annotators. Once an ART annotation task is completed a SSTC task follows where the ROI and the CMAs of the lead pathologist are provided. At the end of the workflow each group has provided ART and SSTC annotations for all templates
Train Set Annotation Workflow
The Train Set Annotation workflow serves to create train set annotations. This is done model performance based, meaning a model, that is supposed to be improved, needs to be run as part of the workflow. A lead pathologist then places FOVs on a set of slides to cover areas that the model did not perform well on. The FOVs are then going to be equally split among the assigned pathologists who provide raster annotations for ART or SSTC depending on the configuration of the workflow.
Validation Set Annotation (Morphology based) Workflow
The Validation Set Annotation (Morphology based) workflow serves to create validation annotations. This requires a lead pathologist to place FOVs on a set of slides to cover all required combinations of morphological features.. The FOVs are then going to be equally split among the assigned pathologists who provide raster annotations for ART or SSTC depending on the configuration of the workflow.
Validation Set Annotation (Model-performance based) Workflow
The Validation Set Annotation (Model-performance based) workflow serves to create validation annotations. This is done model performance based, meaning a model, needs to be run as part of the workflow. A lead pathologist then places FOVs on a set of slides depending on the performance of the model. The FOVs are then going to be equally split among the assigned pathologists who provide raster annotations for ART or SSTC depending on the configuration of the workflow.
Whole Slide Image (WSI) Screening Workflow
The WSI Screening workflow is designed for morphological assessment of slides without requiring annotation. This workflow enables systematic review and screening of whole slide images for quality control or initial evaluation purposes.
Review Annotation Workflow
The Review Annotation Workflow is meant for qualifying existing raster annotation sets. For this it allows existing raster annotations to be reviewed, if necessary corrected and finally signed off.
Note: ResultQC workflow was removed
- ResultQC workflow was removed with version 4.3.0 of CP Portal and is no longer available. It is planned to replace it with a similar workflow in the future.
General Workflow Configuration
By opening the workflow configuration (1) a link to a work instruction document can be entered (2). This link will then be available throughout all tasks that are generated as part of the configured workflow
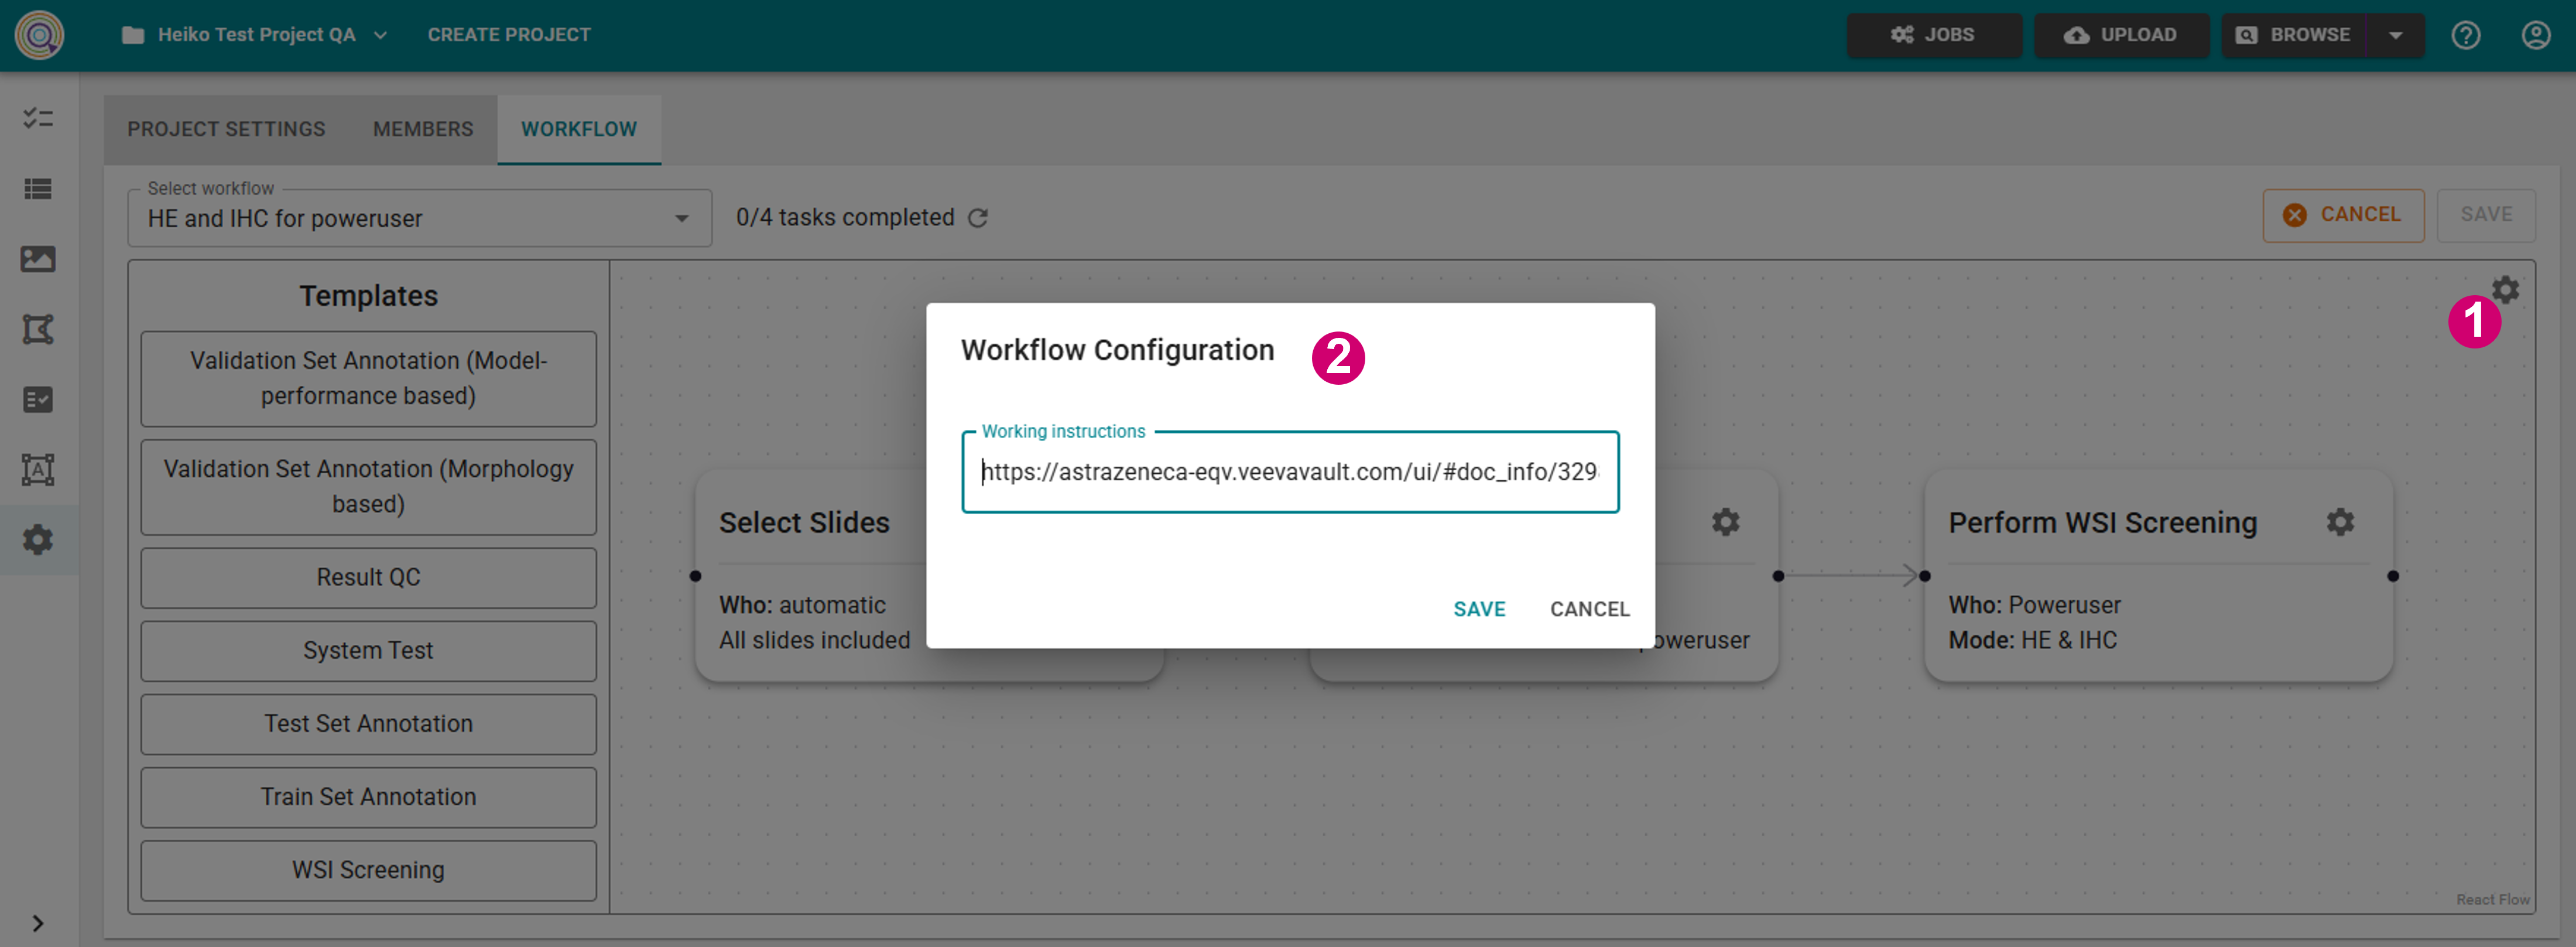
Image: Workflow instructions configuration
Clone workflow configuration
Once a workflow has been started, its configuration becomes fixed and cannot be edited to ensure consistency and traceability. If you need to modify a workflow that has already been started, you must clone it and save it under a new name. This ensures that the original workflow configuration remains intact for reference while allowing you to create and customize a new version.
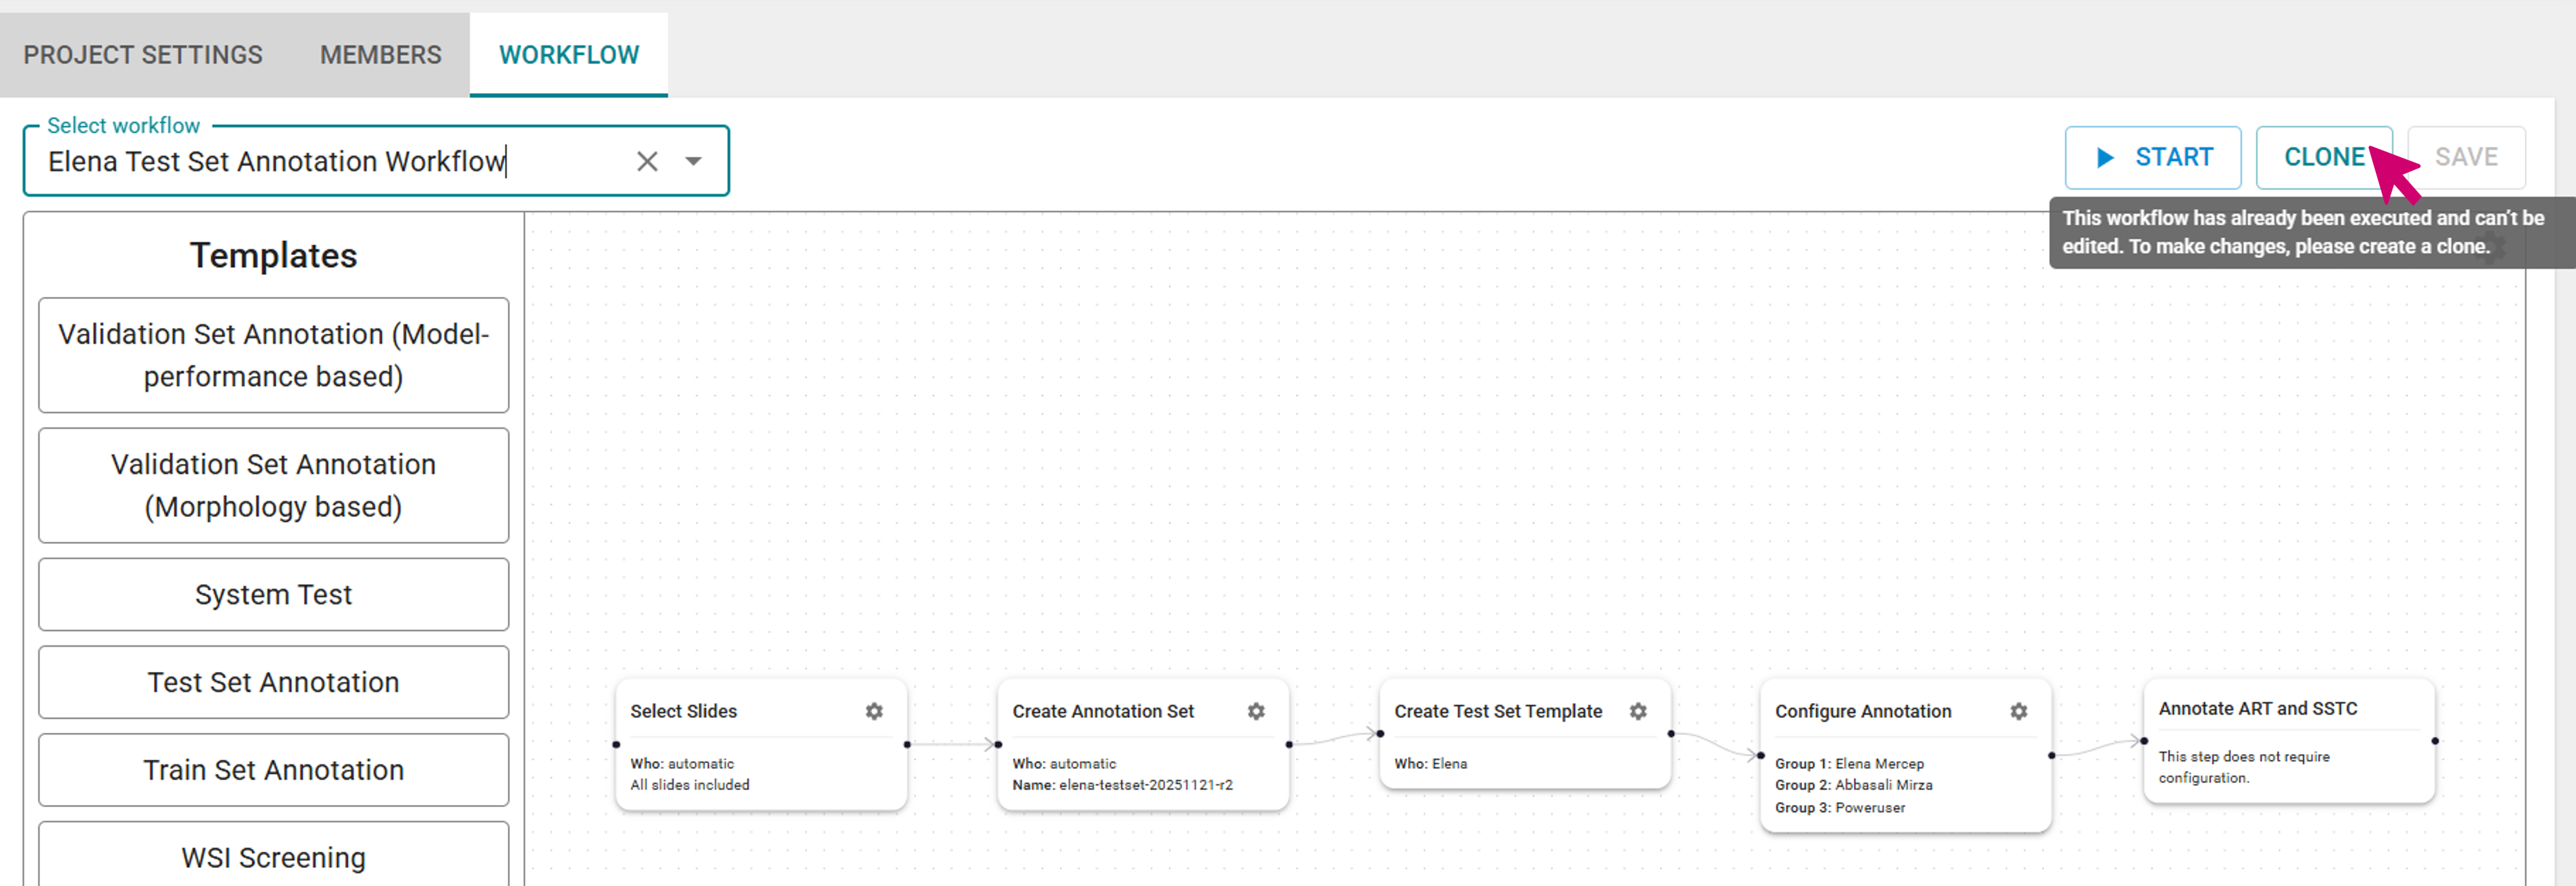
Image: Clone button in Workflow Manager
Configure Test Set Annotation Workflow
Setup Test Set Annotation Workflow configuration
To set up a new Test Set Annotation Workflow, drag and drop the Test Set Annotation Workflow template into the workflow manager. The workflow manager is automatically populated with a chain of the following steps:
- Slide selection step
- Create Annotation Set step
- Create Test Set Template step
- Configure Annotation step
- Annotate ART and SSTC step

Image: Workflow manager with Test Set Annotation Workflow
Slide selection configuration
As part of this step the slides that will be fed in the workflow can be defined. By default inclusion of all slides present in the project at the start of the workflow is selected. As an alternative, the box can be unchecked and the step can be configured to read a filter link, so all slides that fullfill the conditions of the filter link at the start of the workflow will be fed in the workflow.
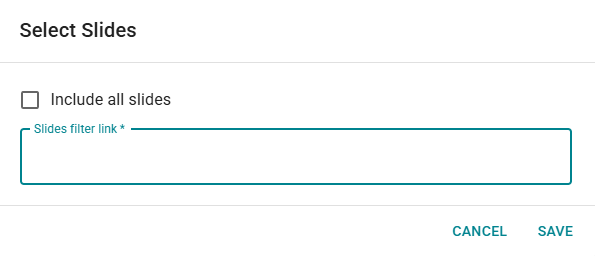
Image: Slide selection configuration window
Note: Task creation in Test set Annotation Workflow is based on slides
- In the Test Set Annotation Workflow a task is created for every slide that is provided. Supporting H&E slides of the same block are automatically shown as part of the workflow and should not need be explicitly included in the filter link.
Create Annotation Sets Configuration
This step automatically creates annotation sets for all slides in the workflow. The name for the annotation set that should be generated has to be specified in the workflow step’S configuration.
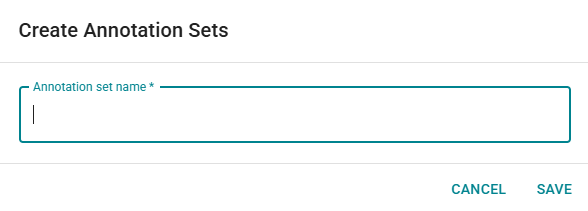
Image: Run solution configuration window
Create Test Set Template Configuration
First a lead pathologist for creating the template (placement of FOVs, ROIs and CMAs) can be selected. Secondly the FOV placement tracker can be configured. It allows to set up a combination of metadata fields and their CV entries as well as a target of how many FOVs with the respective combination of characteristics should be part of the final set of FOVs.
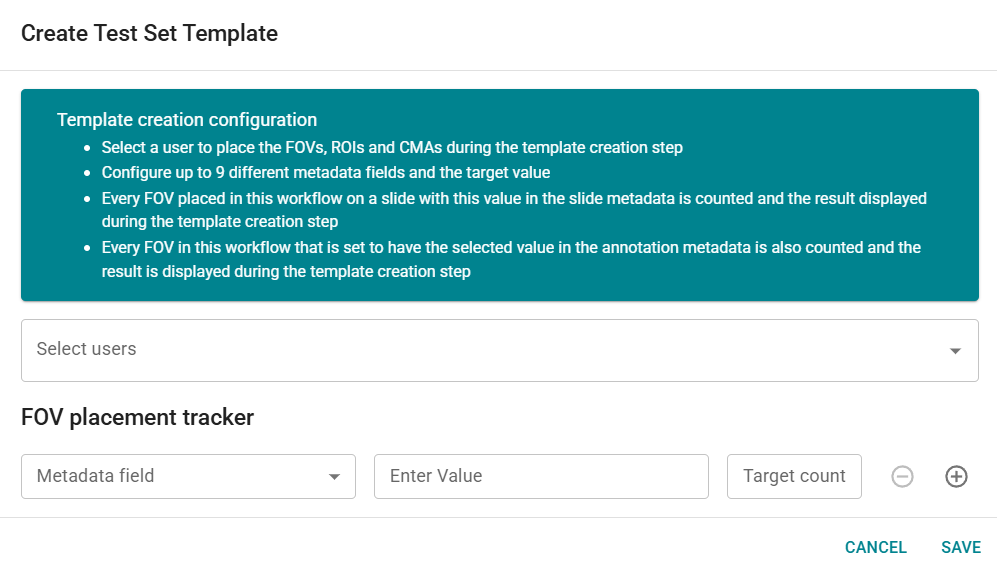
Image: Create Test Set Template configuration window
Note: Counting of FOV placement tracker
- The system will count an FOV that is placed on a slide with the given slide metadata CV entry or in case of annotation metadata, if the FOV metadata shows a configured annotation metadata entry. When several conditions are met, the FOV counts once for each codition.
Configure Annotation Configuration
In this step the settings for creation of the raster annotations are made. For each group of annotators, users can be selected. Each group needs at least one annotator assigned to it and no annotator can be part of two different groups. Apart from that the annotation classes that shall be available for the ART annotation step can be selected. Lastly, the annotation set base names for the annotation sets for ART and SSTC can be selected.
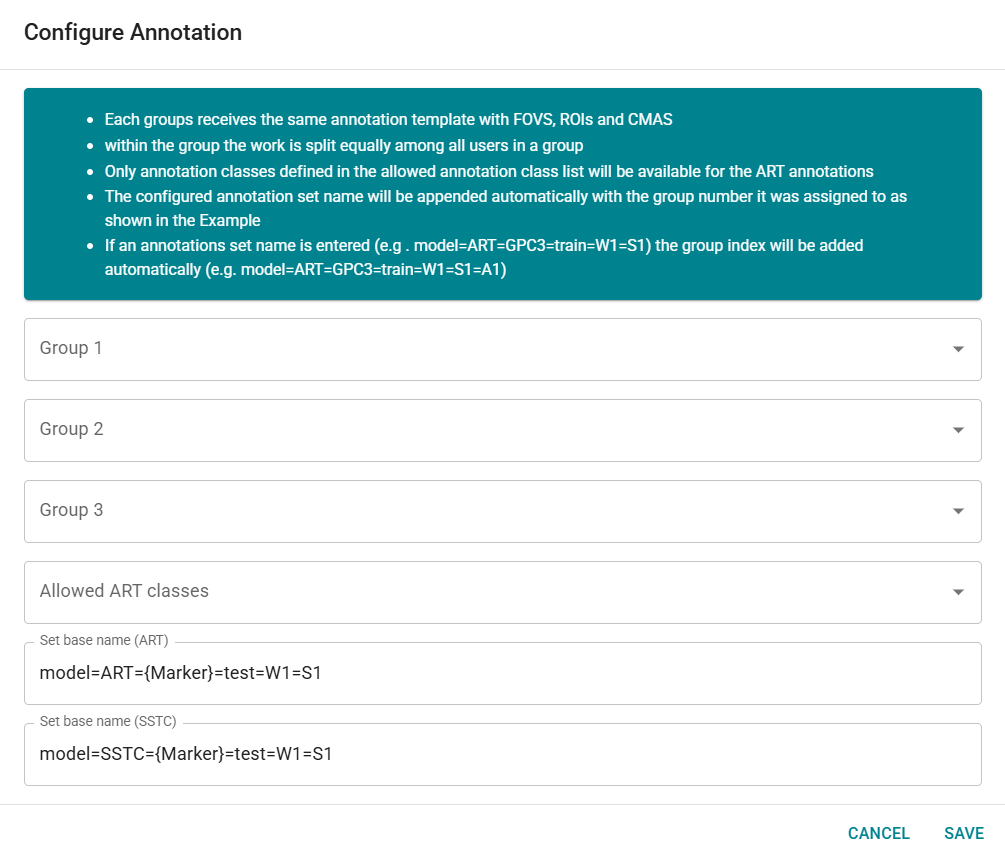
Image: Configure Annotation window
Note: Annotation Set Group number
- During the workflow , each annotation set name is appended with the group numbers 1 to 3 automatically to allow distinguishing them.
Annotate ART and SSTC configuration
This step does not require any configuration.
Configure Train Set Annotation Workflow
Setup Train Set Annotation Workflow configuration
To set up a new Train Set Annotation Workflow, drag and drop the Train Set Annotation Workflow template into the workflow manager. The workflow manager is automatically populated with a chain of the following steps:
- Slide selection step
- Run solution step
- Create Annotation Set step
- Place FOVs step
- Configure Annotation step
- Annotate ART or SSTC step
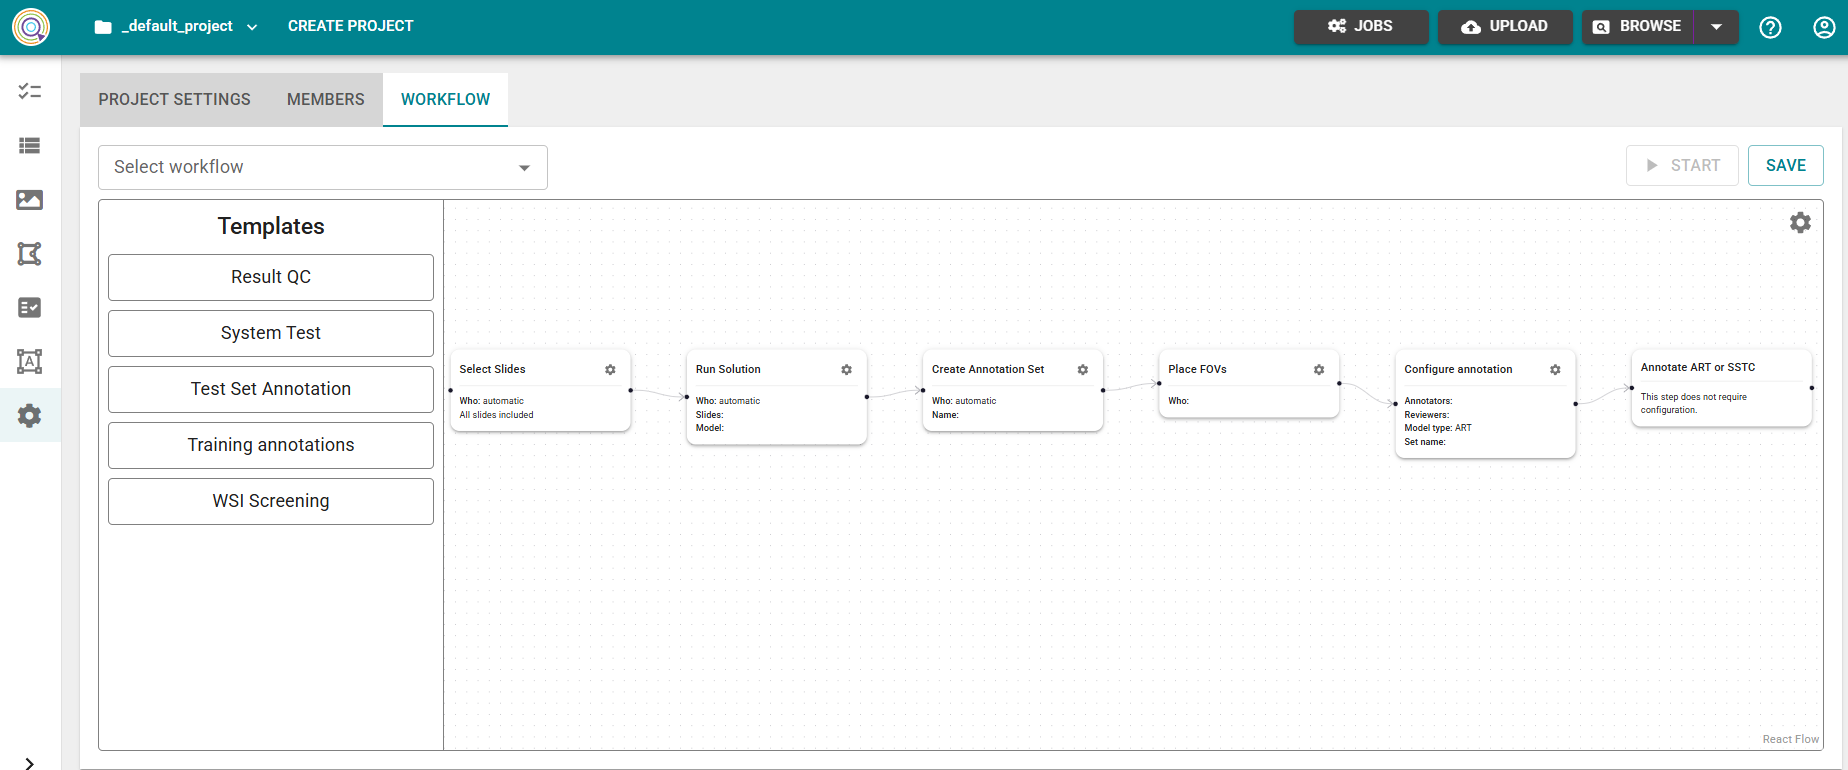
Image: Workflow manager with Train Set Annotation Workflow
Slide selection configuration
As part of this step the slides that will be fed in the workflow can be defined. By default inclusion of all slides present in the project at the start of the workflow is selected. As an alternative, the box can be unchecked and the step can be configured to read a filter link, so all slides that fulfil the conditions of the filter link at the start of the workflow will be fed in the workflow.
Image: Slide selection configuration window
Note: Task creation in Train Set Annotation Workflow is based on slides
- In the Train Set Annotation Workflow a task is created for every slide that is provided. Supporting H&E slides of the same block are automatically shown as part of the workflow and do not need to be explicitly added in the filter link.
Run Solution configuration
This step is meant to automatically execute a Predictino pipeline with a configured model on all slides in the workflow. The delivery created by the pipeline will be automatically available in the view for placing FOVs when opening a task to “Place FOVs” from the task list. The configuration steps depend on the selected model and are the same as when running Predictino from the UI. The only difference is that the configuration is saved and the job is only started once the workflow reaches the “Run Solution” step.
Important
- Some models generate several deliveries. The system selects the delivery that matches the experiment name configured as part of the Run Solution configuration available in the view for Place FOVs.
Image: Run solution configuration window
Create Annotation Sets Configuration
This step automatically creates annotation sets for all slides in the workflow. The name for the annotation set that should be generated has to be specified in the workflow step’S configuration.
Image: Create Annotation Sets configuration window
Place FOVs Configuration
In this configuration the lead pathologist for placing the FOVs can be selected.
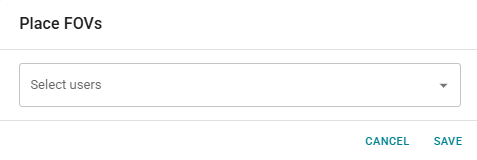
Image: Place FOVs configuration window
Configure Annotation Configuration
In this step the settings for creation of the raster annotations are made. The annotators among which the system equally shares the annotation tasks can be selected as can be the pool of reviewers for the review of the raster annotations. Additionally, it can be configured if the annotators are supposed to create ART or SSTC annotations and a name for the raster annotation set that will be created to hold all raster annotations created as part of the workflow. In case ART annotations are configured, the available ART annotation classes can be selected as well.
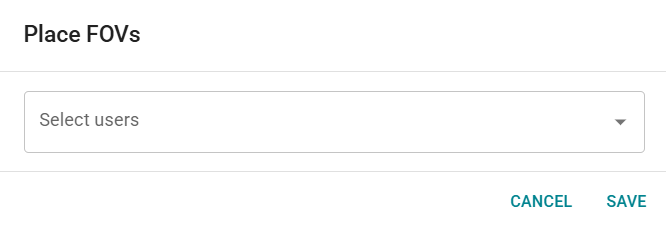
Image: Configure Annotation window
Annotate ART and SSTC configuration
This step does not require any configuration.
Configure Validation Set Annotation (Morphology based) Workflow
Setup Validation Set Annotation (Morphology based) Workflow configuration
To set up a new morphology based Validation Set Annotation Workflow, drag and drop the Validation Set Annotation Workflow template into the workflow manager. The workflow manager is automatically populated with a chain of the following steps:
- Slide selection step
- Create Annotation Set step
- Place FOVs step
- Run Solution step
- Configure Annotation step
- Annotate ART or SSTC step
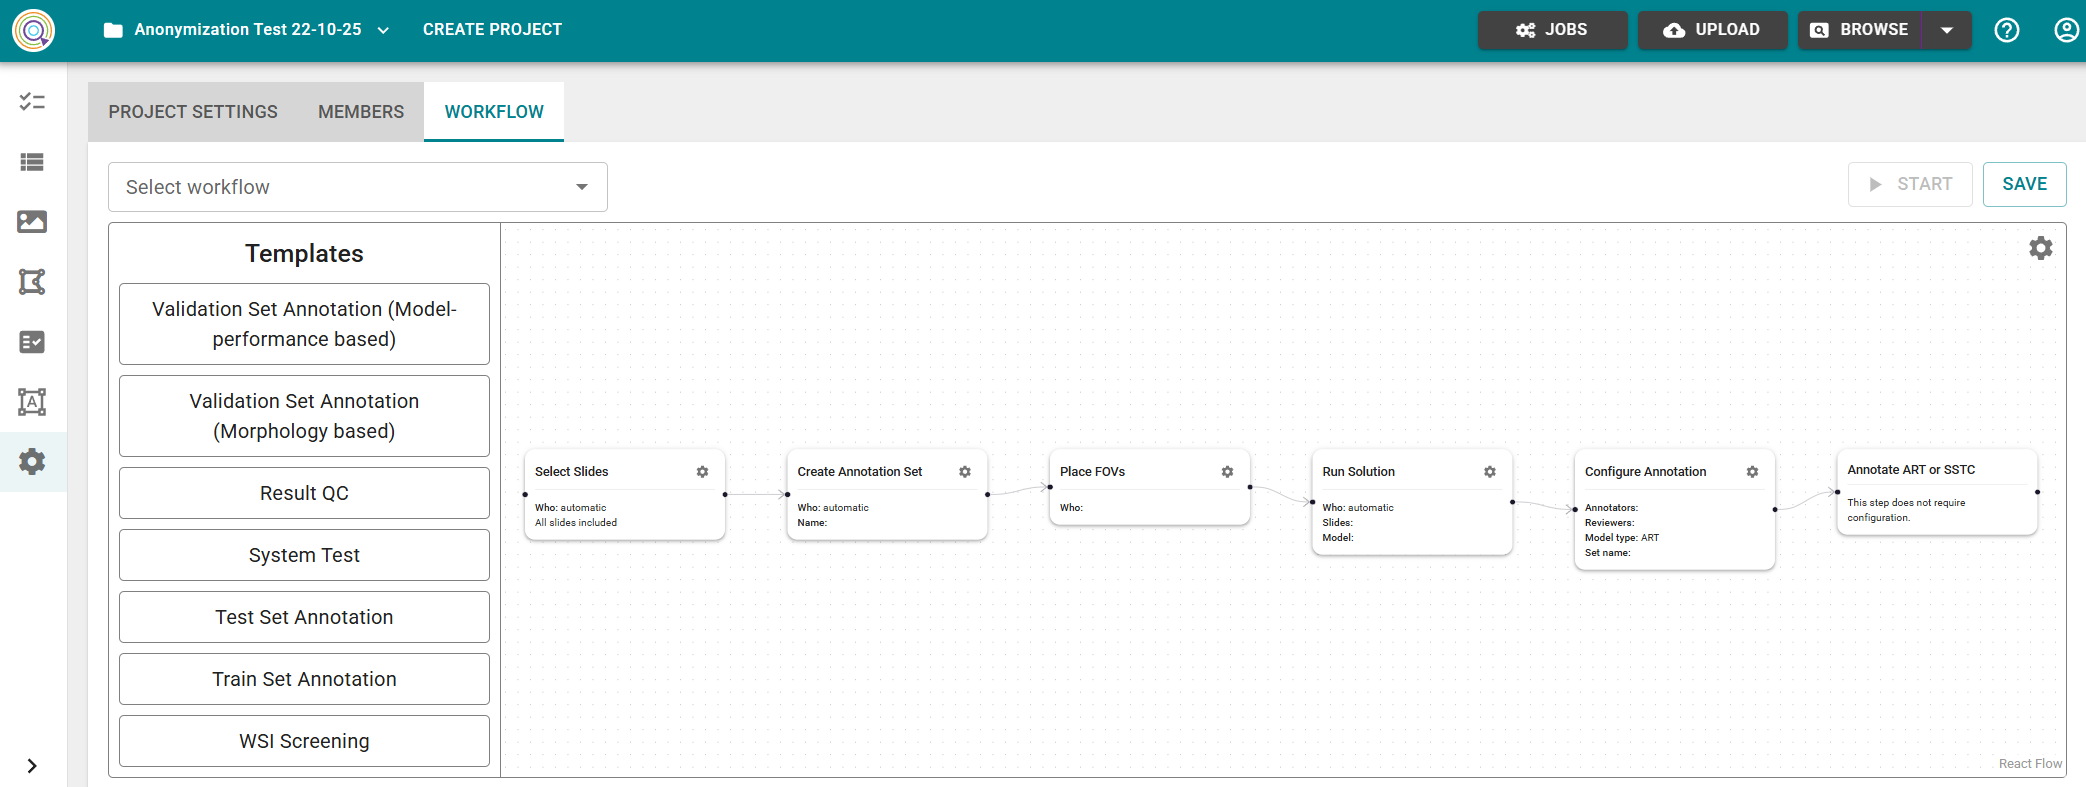
Image: Workflow manager with morphology based Validation Annotation Workflow
Slide selection configuration
As part of this step the slides that will be fed in the workflow can be defined. By default inclusion of all slides present in the project at the start of the workflow is selected. As an alternative, the box can be unchecked and the step can be configured to read a filter link, so all slides that fullfill the conditions of the filter link at the start of the workflow will be fed in the workflow.
Image: Slide selection configuration window
Note: Task creation in Validation Set Annotation Workflows is based on slides
- In the Validation Set Annotation Workflows a task is created for every slide that is provided. Supporting H&E slides of the same block are automatically shown as part of the workflow and should not need be explicitly included in the filter link.
Create Annotation Sets Configuration
This step automatically creates annotation sets for all slides in the workflow. The name for the annotation set that should be generated has to be specified in the workflow step’S configuration.
Image: Run solution configuration window
Place FOVs Configuration
First a lead pathologist for creating the template (placement of FOVs, ROIs and CMAs) can be selected. Secondly the FOV placement tracker can be configured. It allows to set up a combination of metadata fields and their CV entries as well as a target of how many FOVs with the respective combination of characteristics should be part of the final set of FOVs.
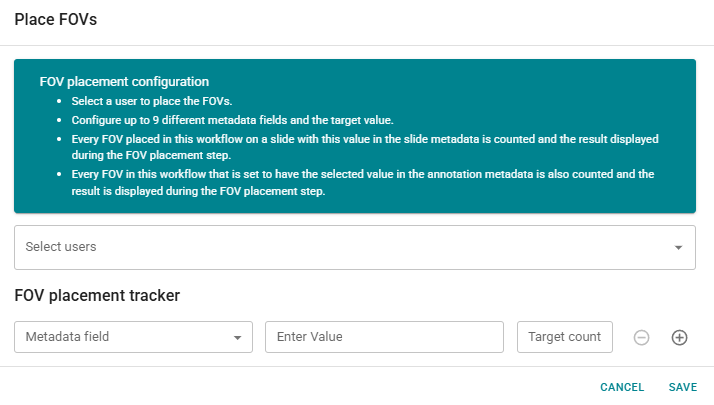
Image: Place FOVs configuration window
Note: Counting of FOV placement tracker
- The system will count an FOV that is placed on a slide with the given slide metadata CV entry or in case of annotation metadata, if the FOV metadata shows a configured annotation metadata entry. When several conditions are met, the FOV counts once for each codition.
Run Solution configuration
This step is meant to automatically execute a Predictino pipeline with a configured model on all slides in the workflow. The delivery created by the pipeline will be automatically available in the view for placing FOVs when opening a task to “Place FOVs” from the task list. The configuration steps depend on the selected model and are the same as when running Predictino from the UI. The only difference is that the configuration is saved and the job is only started once the workflow reaches the “Run Solution” step.
Important
- Some models generate several deliveries. The system selects the delivery that matches the experiment name configured as part of the Run Solution configuration available in the view for Place FOVs.
Image: Run solution configuration window
Configure Annotation Configuration
In this step the settings for creation of the raster annotations are made. The annotators among which the system equally shares the annotation tasks can be selected as can be the pool of reviewers for the review of the raster annotations. Additionally, it can be configured if the annotators are supposed to create ART or SSTC annotations and a name for the raster annotation set that will be created to hold all raster annotations created as part of the workflow. In case ART annotations are configured, the available ART annotation classes can be selected as well.
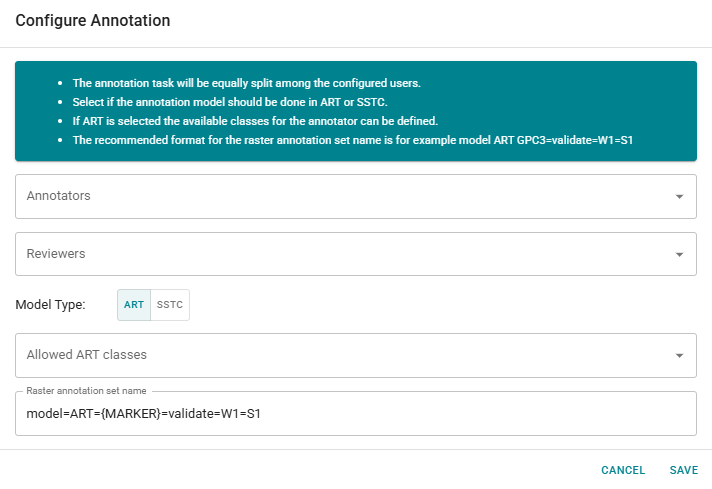
Image: Configure Annotation window
Annotate ART or SSTC configuration
This step does not require any configuration.
Configure Validation Set Annotation (Model-performance based) Workflow
Setup Validation Set Annotation (Model-performance based) Workflow configuration
To set up a new Validation Set Annotation (Model-performance based) Workflow, drag and drop the corresponding template into the workflow manager. The workflow manager is automatically populated with a chain of the following steps:
- Slide selection step
- Run solution step
- Create Annotation Set step
- Place FOVs step
- Configure Annotation step
- Annotate ART or SSTC step
Image: Workflow manager with Validation Set Annotation (Model-performance based) Workflow
Slide selection configuration
As part of this step the slides that will be fed in the workflow can be defined. By default inclusion of all slides present in the project at the start of the workflow is selected. As an alternative, the box can be unchecked and the step can be configured to read a filter link, so all slides that fulfil the conditions of the filter link at the start of the workflow will be fed in the workflow.
Image: Slide selection configuration window
Note: Task creation in Validation Set Annotation Workflows is based on slides
- In the Validation Set Annotation Workflows a task is created for every slide that is provided. Supporting H&E slides of the same block are automatically shown as part of the workflow and do not need to be explicitly added in the filter link.
Run Solution configuration
This step is meant to automatically execute a Predictino pipeline with a configured model on all slides in the workflow. The delivery created by the pipeline will be automatically available in the view for placing FOVs when opening a task to “Place FOVs” from the task list. The configuration steps depend on the selected model and are the same as when running Predictino from the UI. The only difference is that the configuration is saved and the job is only started once the workflow reaches the “Run Solution” step.
Important
- Some models generate several deliveries. The system selects the delivery that matches the experiment name configured as part of the Run Solution configuration available in the view for Place FOVs.
Image: Run solution configuration window
Create Annotation Sets Configuration
This step automatically creates annotation sets for all slides in the workflow. The name for the annotation set that should be generated has to be specified in the workflow step’S configuration.
Image: Create Annotation Sets configuration window
Place FOVs Configuration
In this configuration the lead pathologist for placing the FOVs can be selected.
Image: Place FOVs configuration window
Configure Annotation Configuration
In this step the settings for creation of the raster annotations are made. The annotators among which the system equally shares the annotation tasks can be selected as can be the pool of reviewers for the review of the raster annotations. Additionally, it can be configured if the annotators are supposed to create ART or SSTC annotations and a name for the raster annotation set that will be created to hold all raster annotations created as part of the workflow. In case ART annotations are configured, the available ART annotation classes can be selected as well.
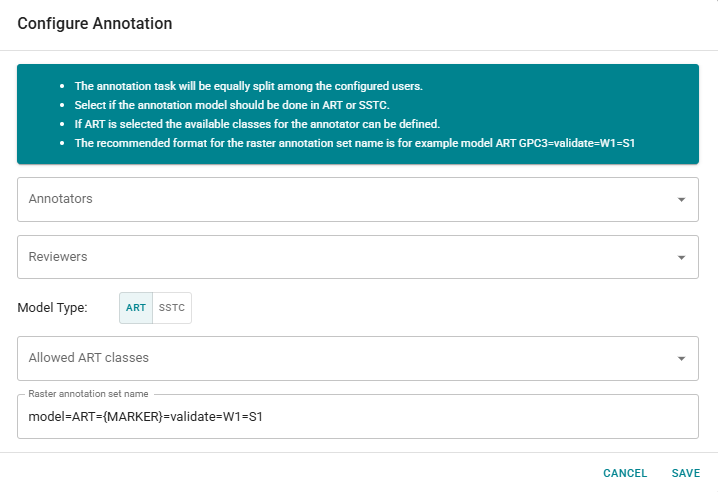
Image: Configure Annotation window
Annotate ART and SSTC configuration
This step does not require any configuration.
Configure WSI Screening Workflow
Setup WSI Screening Workflow configuration
To set up a new WSI Screening workflow, drag and drop the WSI Screening workflow template into the workflow manager. The workflow manager is automatically populated with a chain of the following steps:
- Slide selection step
- Create Annotation Set step
- Perform WSI Screening step

Image: Workflow manager with WSI Screening Workflow
Slide selection configuration
As part of this step the slides that will be fed in the workflow can be defined. By default inclusion of all slides present in the project at the start of the workflow is selected. As an alternative, the box can be unchecked and the step can be configured to read a filter link, so all slides that fullfill the conditions of the filter link at the start of the workflow will be fed in the workflow.
Image: Slide selection configuration window
Note: Task creation in WSI Screening workflows is based on Block IDs
- In the WSI Screening Workflows tasks are on the level of the Block IDs that are found among the provided slides. At a minimum a Block ID must have one H&E image for a task to be created. If additionally at least one IHC image from the Block ID is available and the IHC evluation has been enbaled, a task for IHC assessment can be created as well.
Create Annotation Sets Configuration
This step automatically creates annotation sets for all slides in the workflow. The name for the annotation set that should be generated has to be specified in the workflow step’S configuration.
Image: Run solution configuration window
Perform WSI Screening
The task mode can be selected to decide whether task should be created for HE assessment or IHC assessment or both. Additionally one or several users can be configured to carry out the assessment. If more than one user is selected, the tasks get equally distributed among the configured users.
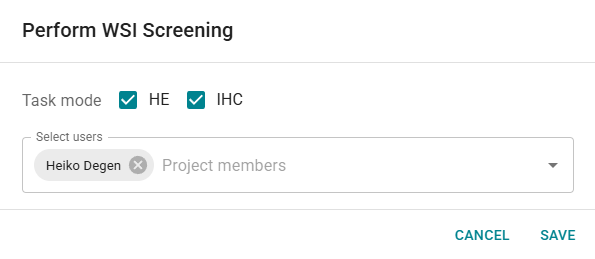
Image: Perform WSI Screening configuration window
Configure Review Annotation Workflow
Setup Review Annotation Workflow configuration
To set up a new Review Annotation workflow, drag and drop the Review Annotationworkflow template into the workflow manager. The workflow manager is automatically populated with a chain of the following steps:
- Slide selection step
- Select Annotation Set step
- Configure Annotation Review step
- Review ART or SSTC
- Correct ART or SSTC
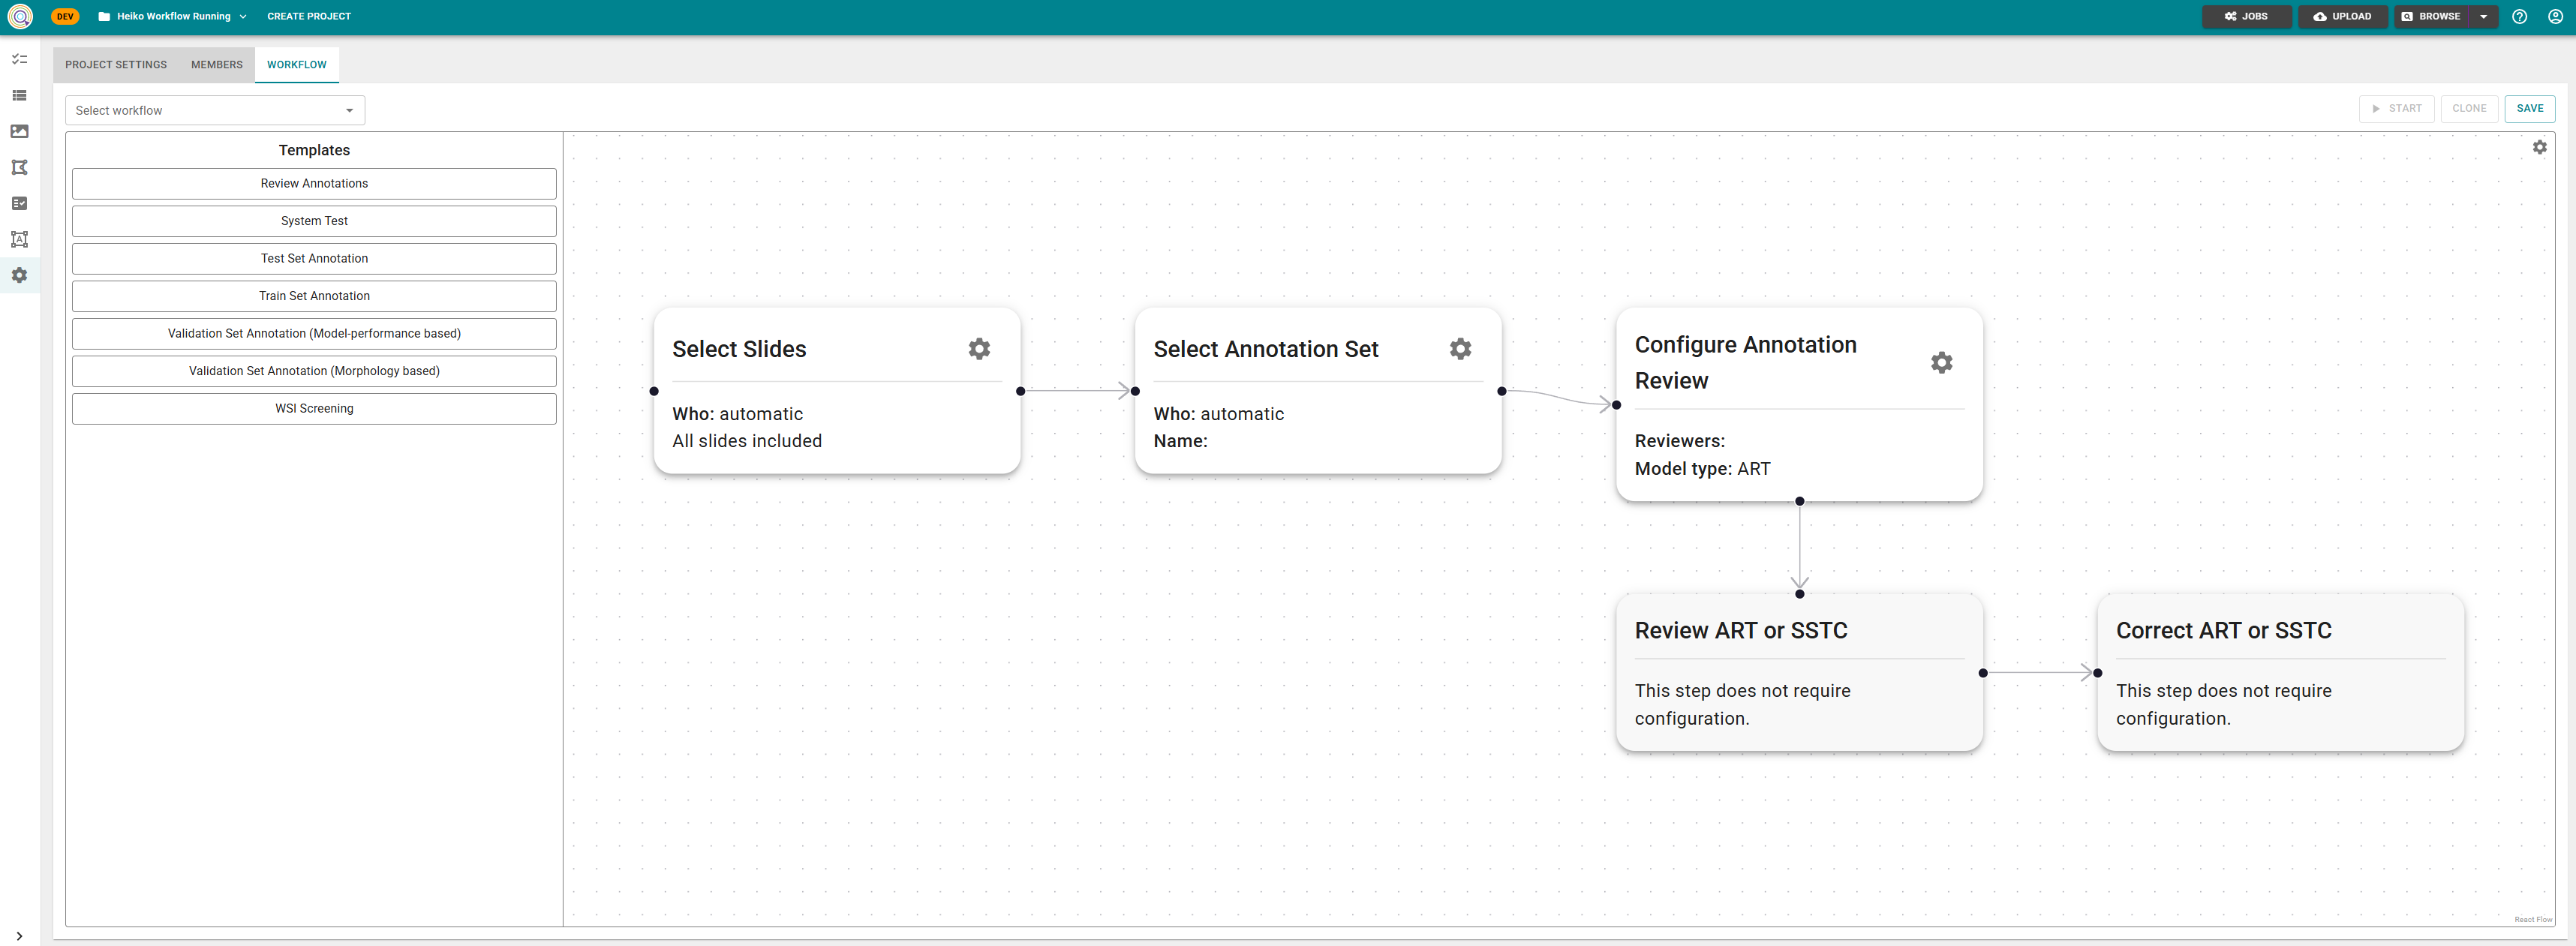
Image: Workflow manager with Review Annotation Workflow
Slide selection configuration
As part of this step the slides that will be fed in the workflow can be defined. By default inclusion of all slides present in the project at the start of the workflow is selected. As an alternative, the box can be unchecked and the step can be configured to read a filter link, so all slides that fullfill the conditions of the filter link at the start of the workflow will be fed in the workflow.
Image: Slide selection configuration window
Note: Task creation in Review Annotation workflows is based on raster annotation sets.
- Task creation in Review Annotation workflows is based on raster annotation sets. For all raster annotation sets with annotations of the configured mode (ART or SSTC) that are included in the FOVs in the defined vector annotation set on the provided slides, a task is created.
Select Annotation Sets Configuration
This step automatically creates annotation sets for all slides in the workflow. The name for the annotation set that should be generated has to be specified in the workflow step’S configuration.
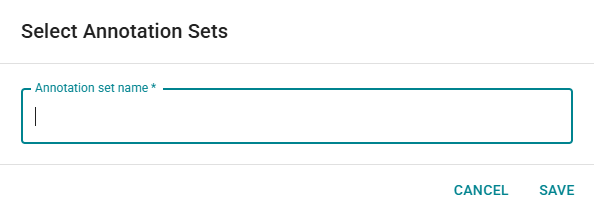
Image: Select Annotation Set configuration window
Configure Annotation Review
The steps allows for the configuration of reviewers for the annotations. If several reviewers are selected, the tasks get equally distributed among all reviewers. Additionally the desired model type (ART or SSTC) needs to be specified. The FOV random sample size is an optional configuration. It allows to have the system randomly select a specified number of FOVs from the configured annotation set on the provided slides and only create tasks for the raster annotations included in these randomly selected FOVs. Lastly the configuration of annotators allows to restrict the ability of reviewers to request annotation corrections only from the specified users instead of from all eligible users in the project.
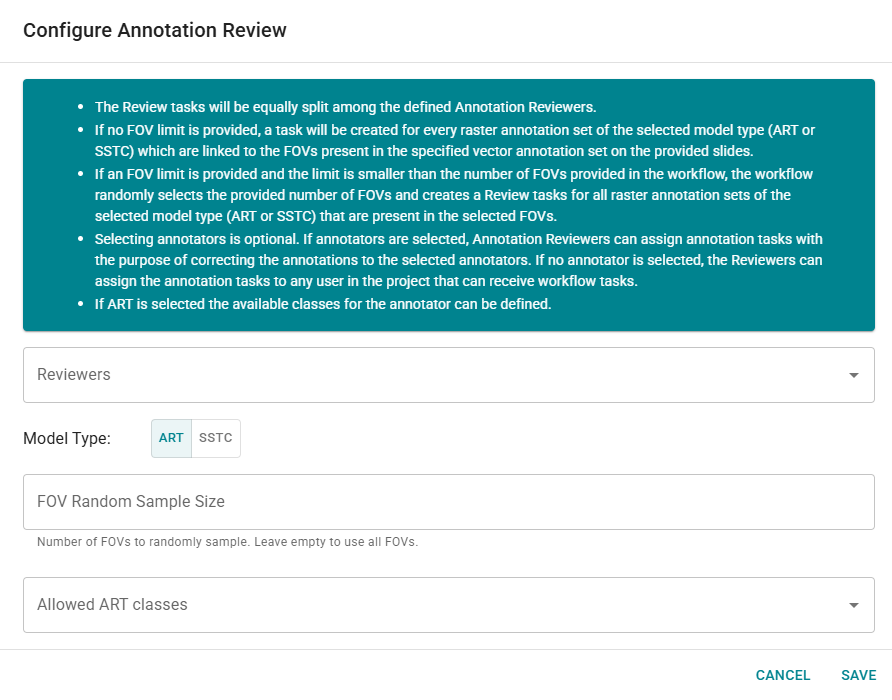
Image: Configure Annotation Review configuration window
Configure Review ART or SSTC
This step does not require any configuration.
Correct ART or SSTC
This step does not require any configuration.
Save and start a workflow
You can save your workflow configuration by using the “save” button and entering a name for the workflow. After that you can retrieve the workflow from the drop-down above the templates.
To start a workflow all steps need to be configured. Also no other workflow is allowed to be running in the same project.
To start the workflow click the “Start” button.