What can be uploaded
You can upload a comma-separated or semicolon-separated .csv file that contains:
In the annotations tab in the image viewer:
- One header row
- At least one data row with a file name
You can map your CSV column names to the Portal columns in the Wizard itself.
Required slide metadata
Please include the following information for each slide:
- Slide Filename (no need for file extension)
- Block ID
- Assay Info (Hyphen-separated markers)
- Method
- Indication
- Sample Type
- Anatomic Location
- Acronym
- Primary or Metastasis
- Subject ID
- Study D-Code
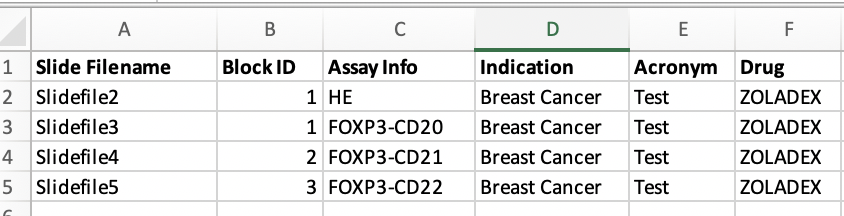
Image: Example CSV with slide metadata
Controlled vocabulary
For following fields, a controlled vocabulary is enforced:
- Assay Info
- Method
- Indication
- Sample Type
- Anatomic Location
- Primary or Metastasis
Terms that do not correspond to the allowed vocabulary will not get imported.
You can find allowed terms on the Metadata Table: Data Dictionary page.
Upload metadata CSV
Steps to import the metadata in a bulk:
-
Click on the button.
This will open the CSV Upload Wizard as a new dialog.

Image: Option to open the CSV Upload Wizard
-
Drag & drop your CSV file to the panel or select a CSV file by clicking on the button.
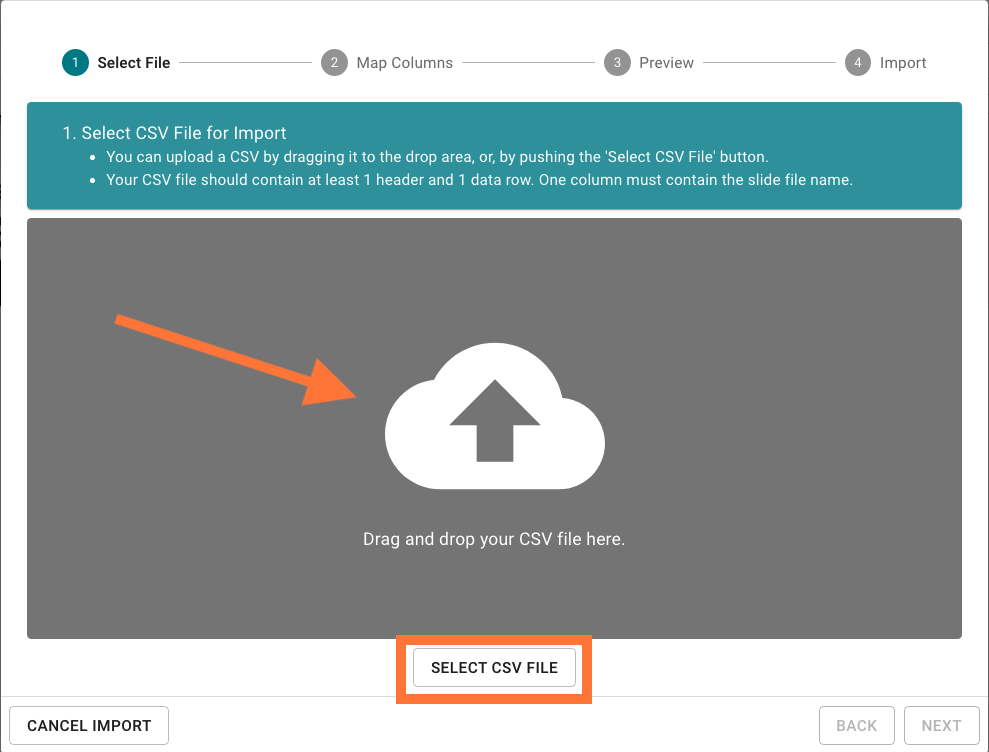
Image: Upload the CSV file to the CSV Upload Wizard
-
If the file has been uploaded correctly, the wizard will display a success message. Otherwise an error message will be shown detailing what the issue is.
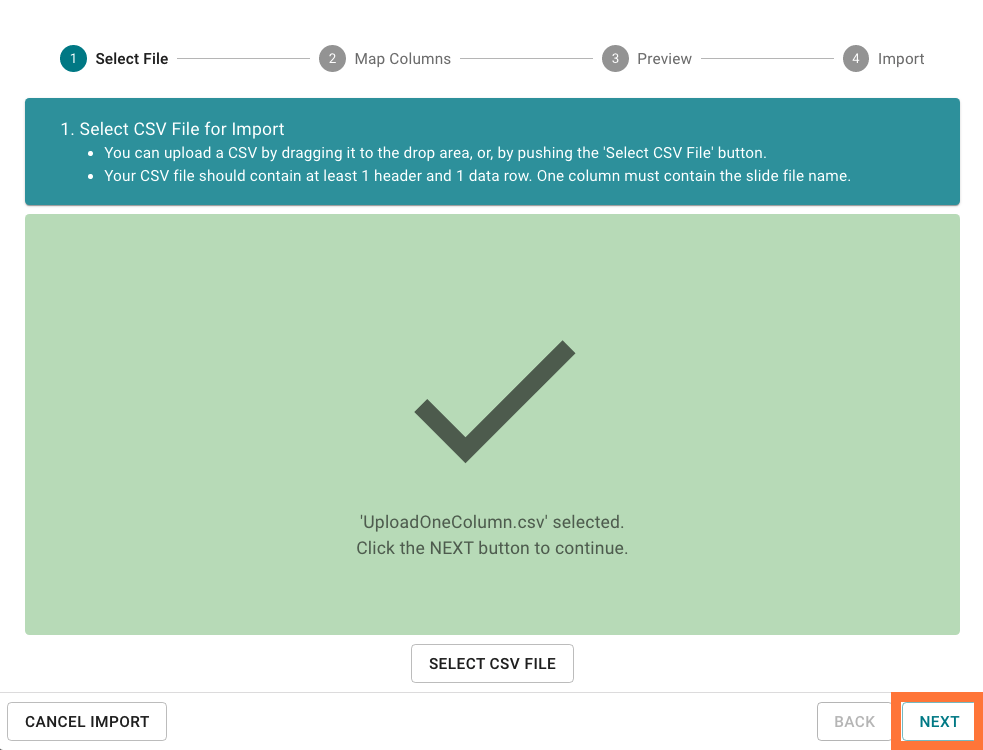
Image: CSV file uploaded successfully
-
To map your CSV columns to the CP Portal metadata columns, double-click on a field under Portal Column Name and select the corresponding entry from the drop-down menu.
CP Portal will try to automatically map CSV columns that have the same name like the Portal columns.
You can select/deselect a column for import by activating the checkbox under Import.
The red error message will inform you if not all required metadata columns have been mapped.
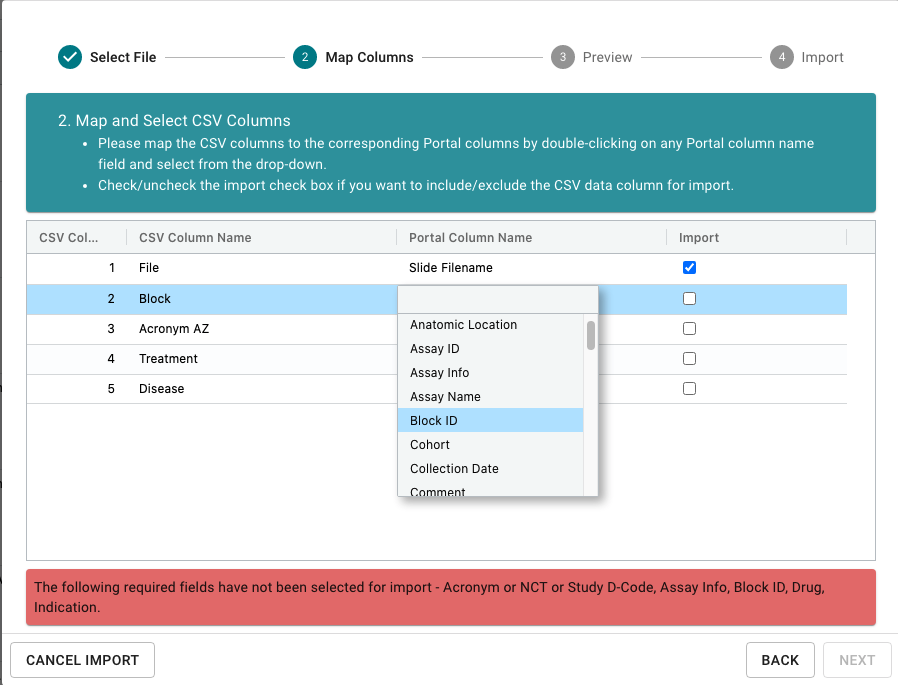
Image: Mapping CSV columns to the CP Portal columns
Clicking on the button will advance the Wizard to the next step.
-
In this step, the columns checked for import will be validated.
To preview the pending import, please look at the preview metadata table.
Only the first 10 rows will be shown.
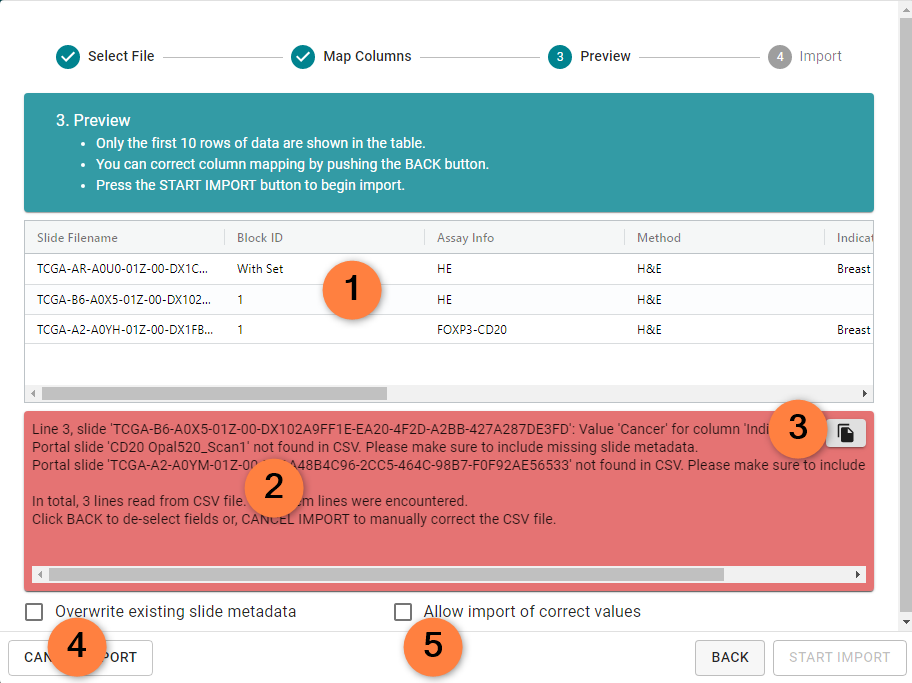
Image: Preview of the CSV import which will be done
Highlighted elements in the CSV Upload Wizard:
- Preview metadata table
- Error notifications
- Copy to clipboard button
- Overwrite check box
- Import checkbox (Ignore errors)
-
Validation errors will be shown in the red panel (2) below the preview table.
Copy all error text to the clipboard by pushing the copy button (3) and paste into and editor of your choice.
You can now decide between several options.
-
Import CSV
Import the correct CSV by clicking the activated button
-
Correct the CSV
- Click the button
- Correct the values in you CSV, using the error notifications as guidance
- Start the upload again
-
Import the CSV and ignore all errors
- Check the Allow import of correct values check box
- Click the button
-
Overwrite existing data (optional)
- Check the Overwrite existing slide metadata check box
- Click the button
-
-
You can see the import progress and copy the import messages to the clipboard using the copy button.
After the import is finished, click the button to close the CSV Upload Wizard.

Image: Import summary
Metadata table: Data dictionary
You can find all allowed terms and data definitions on the Metadata Table: Data Dictionary page.