Open slides from metadata table
You can open a slide in the image viewer, in 2 different ways:
- Double-click on the slide thumbnail in the metadata table
- Right-click mouse button on a slide row and select from the context menu
Slide viewer
Slide or Image viewer is the CP Portal's mode for viewing images.
Open slide viewer
In the left navigation bar, click on the slide viewer icon. The first image in the active project will be shown in the slide viewer.
Slide viewer controls
The screen-shot below shows the slide viewer control elements.
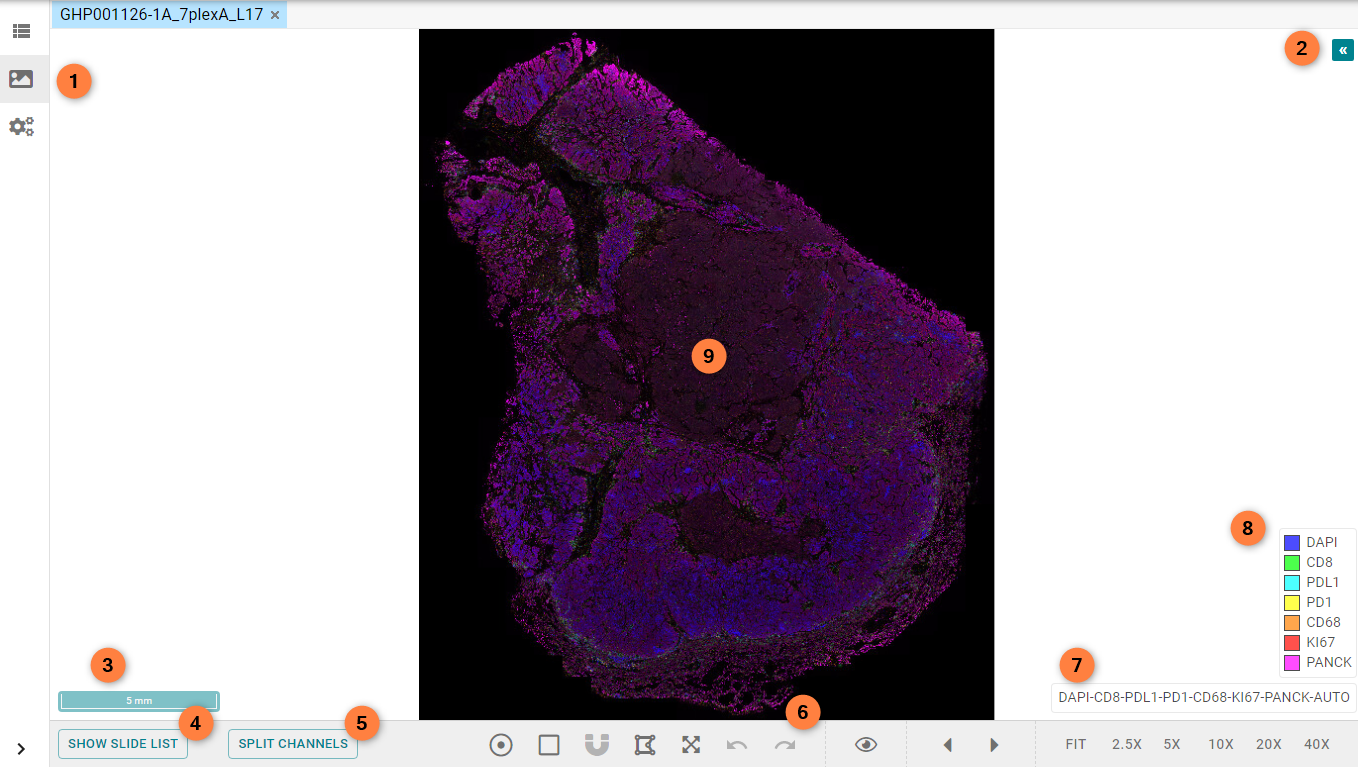
Image: Slide viewer with collapsed panels
Highlighted elements in the Slide viewer:
- Slide viewer icon
- Overview button
- Scale bar
- Slide viewer table button
- Split channels view (only IF slides)
- Tool panel
- Slide Name
- Equalization panel button (IF images only)
- Whole slide image
When the Slide Viewer table button (4), equalization panel button (8) and overview button (2) are clicked, the following user interface items will be opened:
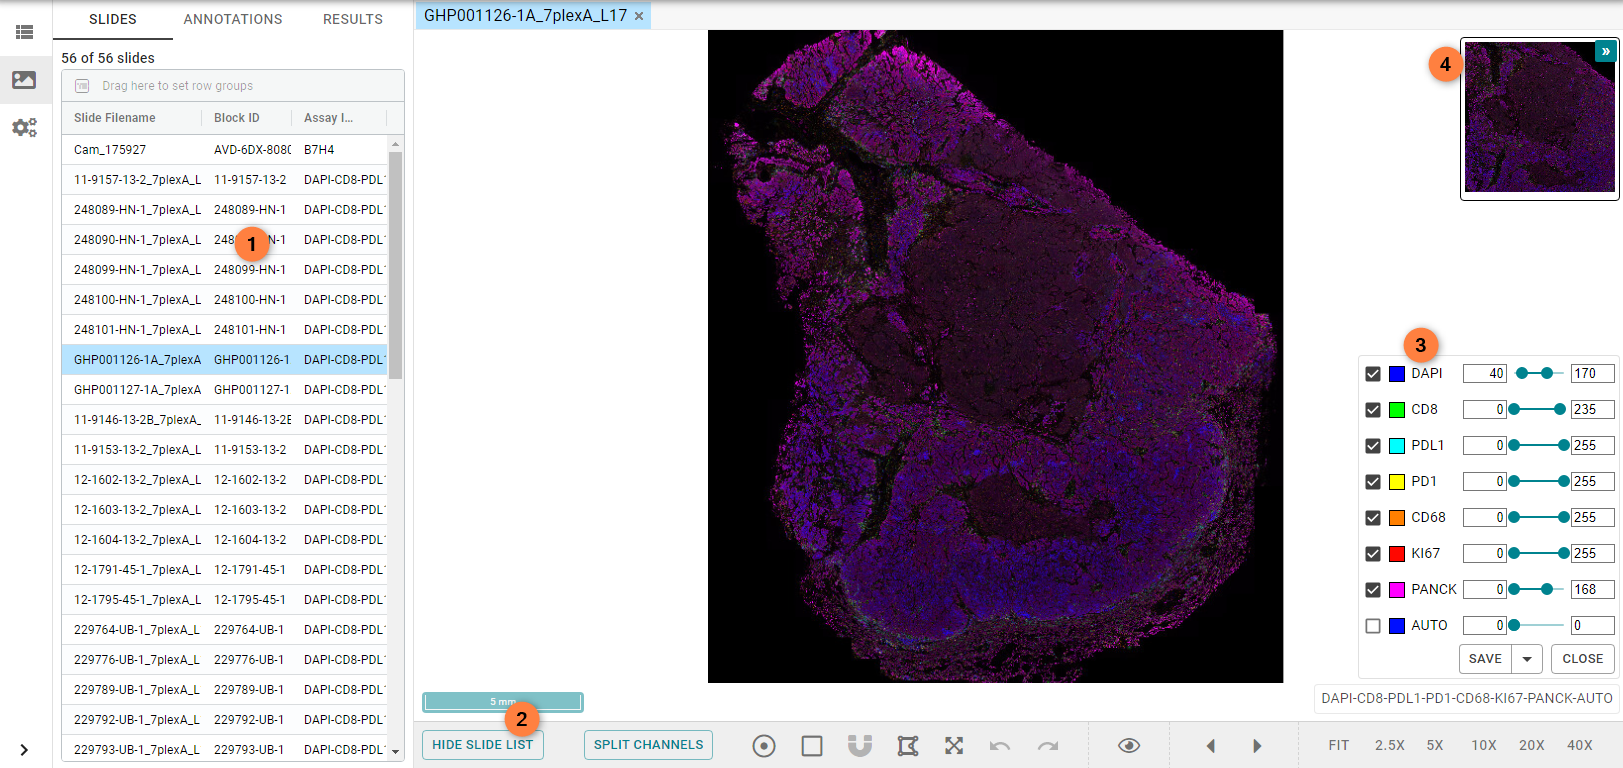
Image: Slide viewer with expanded panels
Highlighted elements in the Slide viewer:
- Slide list table
- Hide slide list button
- Equalization panel
- Thumbnail view
You can freely resize the width of the side panel, by dragging its right-border to a new width.
Open multiple slides in viewer
To open multiple slides in the image viewer:
- Open the slide list table
- Right-click on a slide you want to open
- In the context menu, select "Open Slide in New Tab"
- The slide will open in a new, adjacent viewer window
- The highlighted viewer window is the active one and any manipulations (annotations, results) will be effective for this slide only
- The active slide will also be highlighted in the slide viewer table
Video: Opening multiple slides in the image viewer
Arrange multiple slides in viewer
To arrange multiple slides in the image viewer, drag the individual viewer windows at the header and place them in any position.
Video: Arranging multiple slides in the image viewer
Navigate between slides
To navigate between slides in the image viewer you can use the and buttons at the bottom tools bar.

Image: Slide Viewer control bar
Highlighted elements in the Slide viewer:
- Previous slide button
- Next slide button
- Fit to screen button
- Zoom buttons
Pan slide
To pan the slide in the image viewer:
- Move the mouse pointer into the large view of the slide
- Press and hold the left mouse key
- Move the mouse pointer to pan the slide
Tip: Panning while drawing polygons
- While the polygon tool is active, you can pan the image by pressing the .
Zoom slide
You can use either the mouse wheel or the zoom buttons to zoom into your slide. Use the mouse wheel to zoom in or out (the scale in the slide will adapt to the newly chosen setting). The position of the mouse pointer defines the focus of the enlargement.
The , , , and zoom buttons allow to zoom into the slide by the defined magnification factors.
The button brings the slide back to the default display size, discarding any zoom, rotation or panning settings.
Rotate slide
You can rotate a slide with on Windows, or on Mac.
Coregistration options
When in multi-view mode, the button will become enabled.
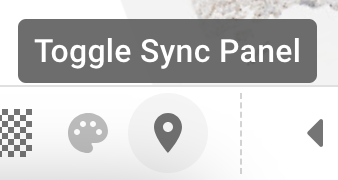
Image: Sync panel button
Clicking on this button will open the Sync panel.
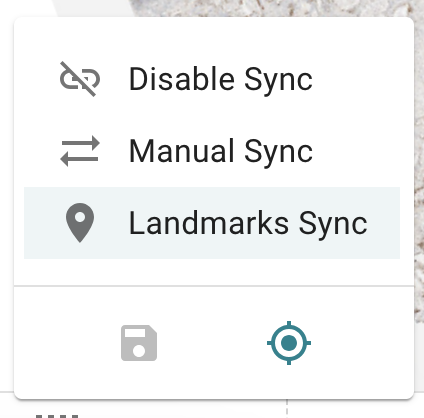
Image: Sync panel
Sync panel options
- option: Selecting this option on blocks with landmarks will temporarily disable the visual linking. It is now possible to move images independently, in multi-view.
- option: Selecting this option will lock the slides in multi-view, now using the manual changes that were made in Disabled sync-mode.
- option: If there are landmarks uploaded to the block, e.g. from Slidematch in Predictino, then by default these landmarks will be used to link slides of the same block visually, in multi-view. Moving one slide will move the other slide of the same block, while in multi-view.
- button: While in the landmark mode in multi-view, there will be a crosshair cursor shown on all additional (side) slides. This crosshair cursor is the equivavelnt mouse pointer on other slides, to your mouse cursor on your currently active slide (where you are pointing). Use the button (the Crosshair icon) to disable and reenable the extra crosshair cursor on other slides in multi-view.
- button: You can use the button (the Save icon) to save and overwrite the current landmarks. You will be asked to confirm this, since you will erase any existing landmarks and set a single new landmark on the current block. Please note that there is no way to restore the previous landmarks, except recreating them via Slidematch.
ICC color profile
Slides scanned with an ICC color profile will be displayed in the image viewer with the ICC color profile applied by default.
You can toggle the ICC color profile by clicking on the ICC color profile button (palette icon) in the Display tools panel in the image viewer. The state of the toggle will be carried over when switching between the slides, within a user session.
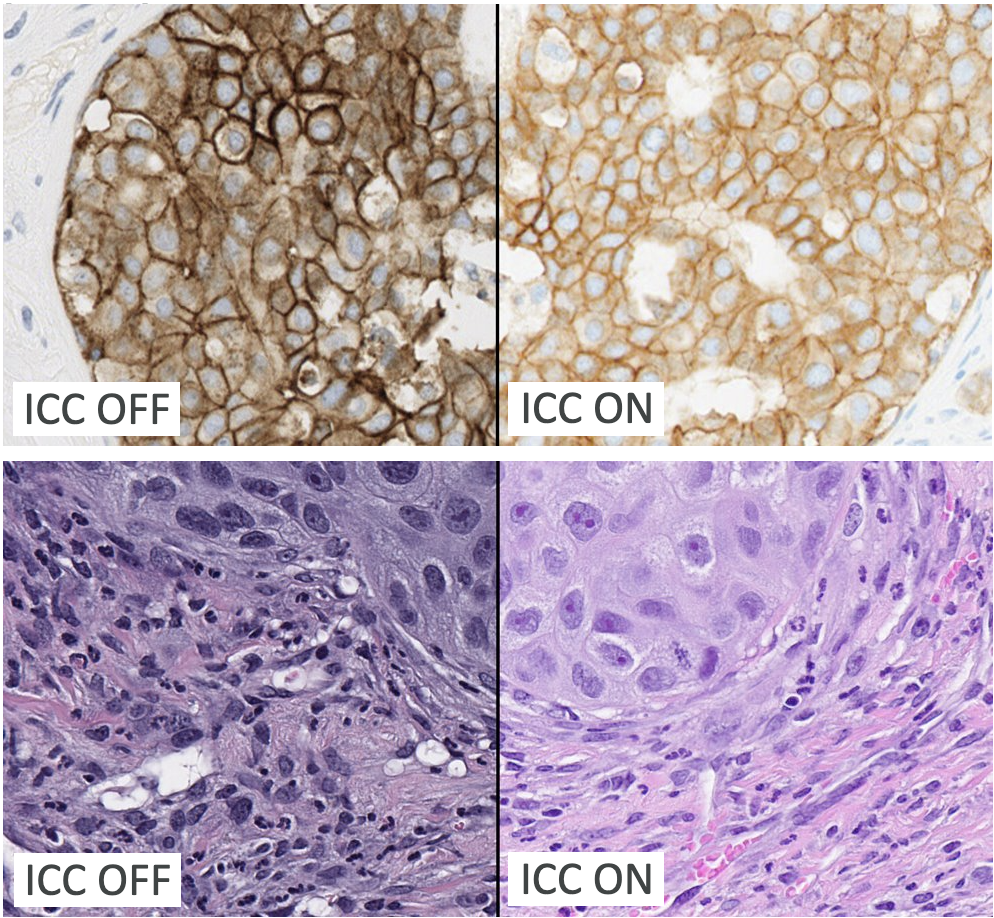
Image: Examples for differences of color profiles off/on in a DAB TROP2 IHC stain (top) and an HE image (bottom)
Tip: Monitor calibration
- To check if your monitor needs to be color-calibrated, you can use the Point of Use QA Pathology Profiler tool.
- Please note that the Point of Use QA tool does not test screen resolution or luminance. Nor does it account for environmental lighting. Passing the test does not mean that the display device is diagnostically valid.
Pixel smoothing
When you first look at a slide in the image viewer you will notice that the when zooming all the way in, the image is smoothed and you cannot see individual pixels.
Image: Difference between the two viewing modes: left is pixel-smoothed view mode, and right is pixelated view mode
Tip: Viewing mode settings
- When changing the viewing mode your settings are remembered for all images in all projects and automatically applied when viewing slides, until you change the viewing mode again
- Viewing mode you selected will also be applied to the results overlay automatically
To turn the pixel smoothing (interpolation) off:
- Open the image viewer
- Click on the Display tools icon
- Click on the button in the Display tools panel in the image viewer
This will turn the pixel smoothing off.
To turn the pixel smoothing (interpolation) on:
- Open the image viewer
- Click on the Display tools icon
- Click on the button in the Display tools panel in the image viewer
This will turn the pixel smoothing on.
Slide list
You can see the list of slides you filtered in the metadata table next to the viewer.
- Click on the button
- Activate the left slides tab
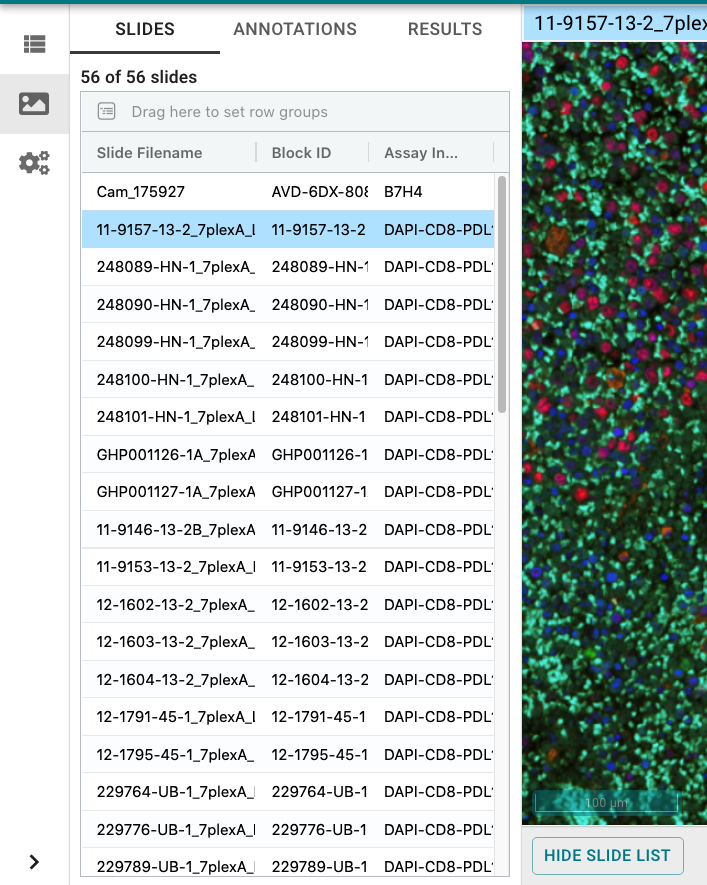
Image: Slide list in the image viewer
Filter in slide list
Similar to the metadata table, you can hover over the column headers to activate the filter menu for each column.
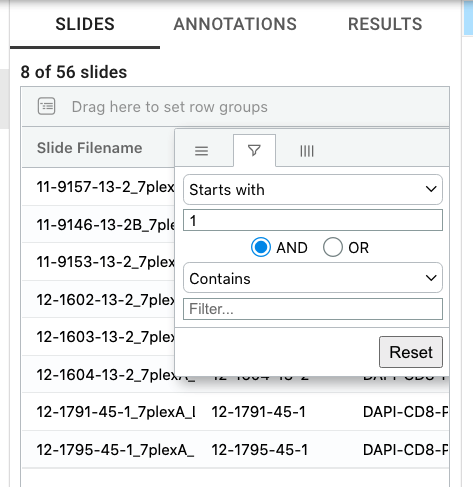
Image: Filter function in slide list
Group slides in slide list
Similar to the metadata table, you can drag the column headers to activate the grouping functionality.
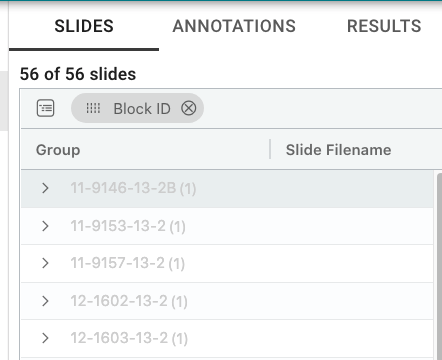
Image: Group function in slide list
IF-slide equalization panel
As a default, IF images will be displayed with linear equalization mode.
The equalization panel allows you to mute and manipulate various color channels. By default, all channels are visible.
The two sliders map the lowest and highest brightness of the channel, respectively. Usually, the max and min values are usually 0 and 255, respectively, but this may vary depending on your slide. Moving the sliders map the pixel value for the left slider to the a new minimal value and the right slider slider to a new maximum level of that channel. The remaining levels are redistributed between these two levels. This redistribution can help increasing the brightness range of the channel, in effect increasing the overall brightness of the channel.
Open the equalization panel
When an IF slide is opened in the image viewer, you can find the collpased equalization panel in the lower right corner.
The channel names are reflecting the markers you chose in the assay info field in the order of the channel numbers you selected there.
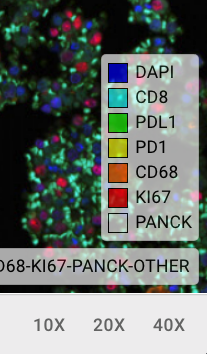
Image: Collapsed equalization panel
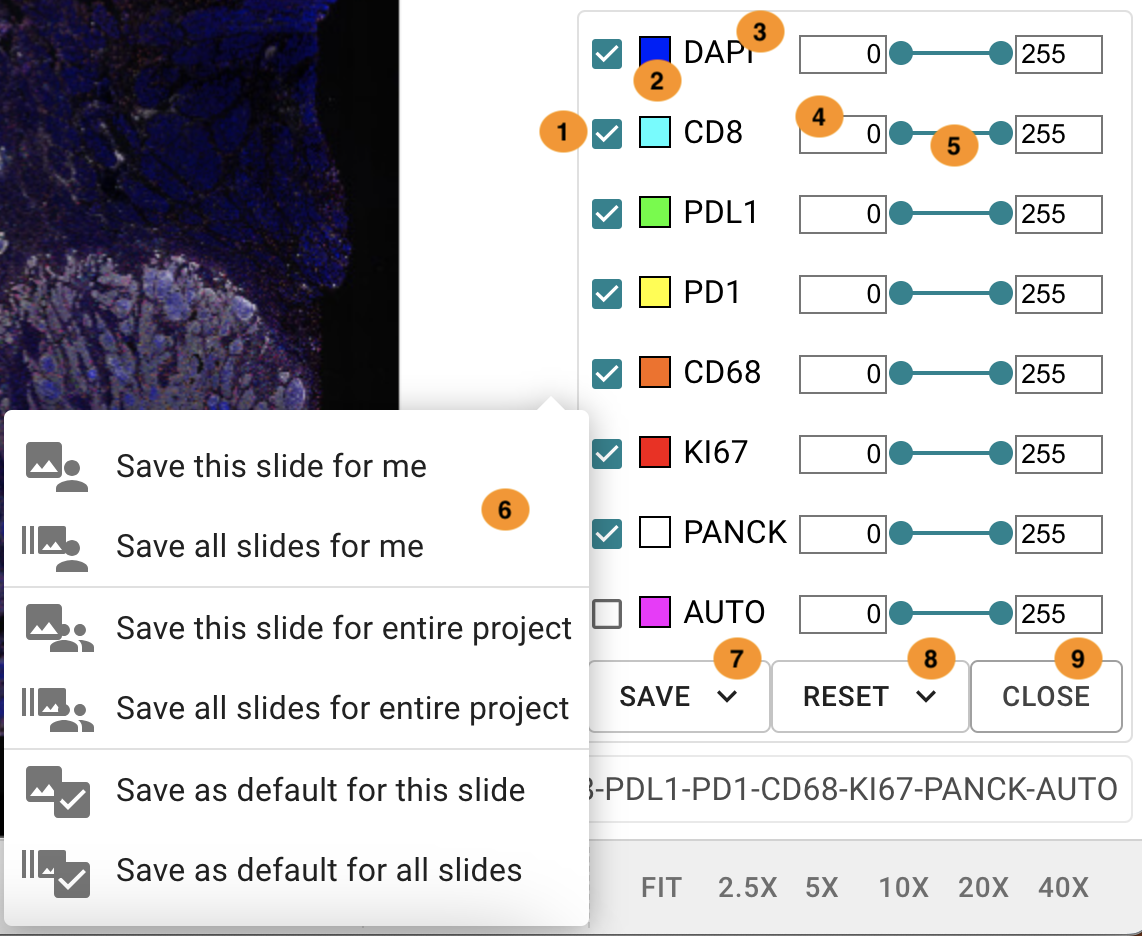
Image: Expanded equalization panel
Highlighted elements in the EQ-panel:
- Check box to show/hide the marker/channel
- Marker/channel color box
- Marker/channel name
- Intensity numbers field
- Intensity slider
- Save button menu
- Save button
- Reset button
- Close button
Change channel color
Similar to the metadata table, you can drag the column headers to activate the grouping functionality.
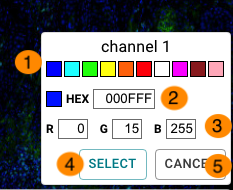
Image: Color picker in the equalization panel
Highlighted elements in the EQ-panel:
- Available colors
- HEX code field
- RGB code fields
- Select button
- Cancel button
Change equalization settings
Change the equalization setting for one IF slide
- Click on the equalization panel to expand it
- Switch a channel off by deselecting it in the check box. Checked channels remain visible
- To change the intensity range of a channel, use the sliders in the panel. The left slider position determines the lowest brightness while the right slider determines the highest brightness shown for that channel. Minimal and maximal ranges can vary depending on your IF slide
- Pressing the button will keep the settings for this image, for this user
- Pressing the close button will collapse the panel. Your changes will not be saved
Change the equalization settings for multiple (filtered) IF slides
- In the metadata table or in the slide list table, filter your slides
- Click on the equalization panel to expand it
- Switch a channel off by deselecting it in the check box. Checked channels remain visible
- To change the intensity range of a channel, use the sliders in the panel. The left slider position determines the lowest brightness while the right slider determines the highest brightness shown for that channel. Minimal and maximal ranges can vary depending on your IF slide
-
Pressing the drop-down arrow next to the button will open more save options
- will save the equalization settings for all filtered slides with the same assay markers for this user
- will save the equalization settings for all filtered slides with the same assay markers for this user
- will save the equalization settings for this slide, for all users in the project
- will save the equalization settings for all filtered slides with the same assay markers, for all users in the project
- will save the equalization settings as the default EQ profile for this slide
- will save the equalization settings as the default EQ profile for all filtered slides with the same assay markers
-
Pressing the reset button will open more reset options:
- will overwrite your current EQ settings with the settings from the default EQ profile for this slide only
- will overwrite your current EQ settings with the settings from the default EQ profile for all filtered slides with the same assay markers for this user
- Pressing the close button will collapse the panel. Your changes will not be saved.
Tip: Permissions
- Note that the and options are allowed only to Project administrators and Project Data Owners
- Using either of these options will overwrite personal equalization settings that all other users may have set for themselves, in the current project
Tile loading error
Missing tiles or failures to retrieve tiles are presented with the error message below. Try panning or zooming in your slide to reload the image. These actions make the application to retrieve such tiles again.
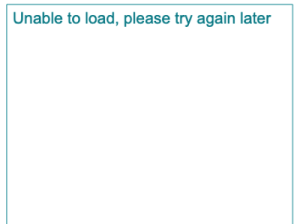
Image: Missing tiles view